Blog

  • Waterproofing Tips for Your Camping Gear

    Waterproofing Tips for Your Camping Gear

    When heading out into the great outdoors, ensuring your camping gear is adequately waterproofed can make all the difference. From sudden downpours to morning dew, the elements can quickly turn your adventure into a damp ordeal. By taking a few simple steps to protect your gear, you can stay dry and comfortable no matter what nature throws your way. So, how can you ensure your equipment is ready to withstand the wettest of conditions?

    Choosing the Right Waterproofing Products

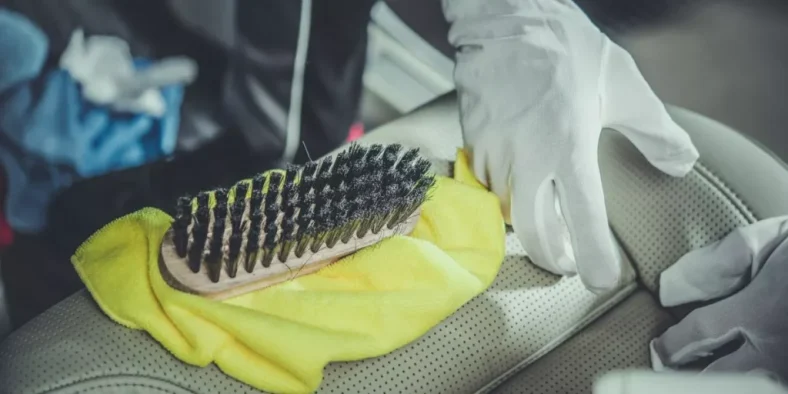
    When waterproofing your camping gear, select a reliable waterproofing spray to ensure optimal protection against moisture. Look for a spray specifically designed for the material of your gear, whether it’s nylon, polyester, or canvas. Ensure the spray is easy to apply and dries quickly to minimize downtime. Check for a spray that provides long-lasting protection, so you don’t have to reapply frequently during your camping trips.

    Consider choosing a silicone-based waterproofing spray for fabrics like nylon and polyester. Silicone creates a durable water-repellent barrier that effectively shields your gear from rain and moisture. For canvas gear, opt for a wax-based waterproofing spray that offers excellent water resistance and durability. Be sure to follow the manufacturer’s instructions when applying the spray to guarantee maximum effectiveness.

    Before purchasing a waterproofing spray, read reviews from other campers to gauge the product’s reliability. Look for a spray that’s highly rated for its waterproofing capabilities and durability in various weather conditions. By selecting the right waterproofing spray, you can enhance the longevity and performance of your camping gear on outdoor adventures.

    Waterproofing Your Tent

    Consider applying a silicone-based waterproofing spray to enhance the water resistance of your tent fabric. This spray forms a protective barrier that helps repel water, keeping you dry during unexpected rain showers. Before spraying, ensure your tent is clean and dry. Apply the spray evenly, focusing on seams and areas prone to leakage. Let it dry completely before packing your tent.

    Inspect your tent regularly for any signs of wear or damage to the waterproof coating. If you notice any issues, reapply the waterproofing spray as needed. Additionally, consider using a ground tarp or footprint under your tent to provide an extra layer of protection against moisture seeping through the bottom.

    When setting up your tent, choose a high and dry location to minimize exposure to water and potential flooding. Avoid placing it in low-lying areas where water can accumulate. Proper maintenance and waterproofing will help extend the life of your tent and ensure a comfortable camping experience.

    Protecting Electronics From Moisture

    To safeguard your electronics from moisture while camping, ensure they’re stored in waterproof containers or protective cases. Electronics such as phones, cameras, and GPS devices are essential tools for many campers, but they can easily be damaged by water. Investing in a quality waterproof case specifically designed for your devices can provide an extra layer of protection. Make sure the seals on these cases are intact and functioning properly before heading out into the wilderness.

    Additionally, consider using silica gel packets inside the cases to absorb any excess moisture that may be present. These packets can help prevent condensation from forming inside the case, keeping your electronics dry and functioning correctly. When not in use, always remember to store your electronics in a dry place, away from any sources of moisture.

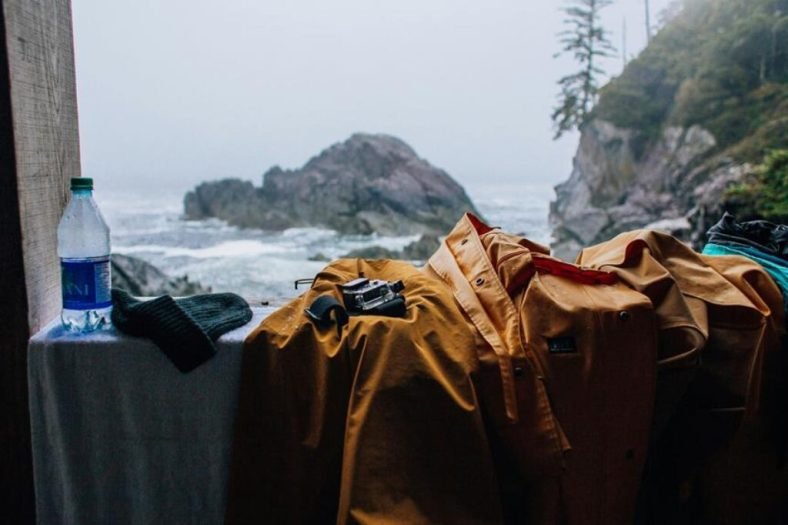
    Waterproofing Clothing and Footwear

    To ensure your comfort and protection during camping trips, it’s important to waterproof your clothing and footwear. Start by choosing clothing made from waterproof or water-resistant materials like Gore-Tex or nylon. Remember to check the seams and zippers for any potential entry points for water.

    If your clothing isn’t inherently waterproof, consider using a waterproofing spray or wash-in product to add a protective layer. For footwear, opt for waterproof hiking boots or shoes to keep your feet dry and comfortable. Make sure to regularly treat them with a waterproofing spray to maintain their effectiveness.

    Additionally, wearing gaiters can help prevent water from seeping into your shoes from the top. When camping in wet conditions, having waterproof clothing and footwear can make a significant difference in your overall experience. By taking the time to waterproof these essential items, you’ll be better prepared to enjoy your outdoor adventures regardless of the weather.

    Camping

    [product_category category=”camping” per_page=”10″ columns=”2″ orderby=”date” order=”rnde”]

  • Seasonal Cooking Hacks for Quick Weeknight Dinners

    Seasonal Cooking Hacks for Quick Weeknight Dinners

    When it comes to tackling hectic weeknights, seasonal cooking hacks can be your saving grace. By making the most of what each season has to offer, you can elevate your meals with minimal effort. From clever ingredient swaps to time-saving techniques, incorporating seasonal elements can transform your dinner routine. Stay tuned to uncover how these simple yet effective strategies can revolutionize your approach to weeknight cooking.

    Benefits of Seasonal Ingredients

    When cooking with seasonal ingredients, you’ll enjoy fresher flavors and higher nutritional value in your meals. By choosing fruits and vegetables that are in season, you’re selecting produce that has had the chance to fully ripen before being harvested, resulting in better taste and texture. The proximity of seasonal ingredients also means they’re more likely to be locally sourced, reducing the carbon footprint of your meals.

    Additionally, seasonal ingredients are typically more affordable because they’re abundant at the time, making it a budget-friendly option for your weeknight dinners. The high availability of these ingredients also means you have a wide variety to choose from, allowing you to experiment with different flavors and recipes throughout the year.

    Moreover, seasonal ingredients offer a greater nutritional punch. They’re packed with vitamins, minerals, and antioxidants that are at their peak levels when the produce is in season. This means you’re not only enjoying delicious meals but also reaping the full health benefits of these fresh ingredients.

    Time-Saving Cooking Tips

    To save time in the kitchen, streamline your cooking process with these efficient tips. Start by meal planning for the week ahead to avoid last-minute scrambles.

    Prep ingredients in advance by washing, chopping, and storing them in airtight containers. This way, when it’s time to cook, everything is ready to go.

    Utilize one-pot or sheet pan recipes to cut down on dishes and cooking time. These dishes often involve throwing everything together and letting it cook, saving you precious minutes.

    Invest in kitchen gadgets like a pressure cooker or slow cooker to help speed up the cooking process. These appliances can help you make flavorful meals in a fraction of the time.

    Additionally, consider cooking in batches and freezing portions for later use. This way, you can have quick meals on hand for those busy nights when cooking from scratch isn’t an option.

    Flavorful Seasonal Recipe Ideas

    For a burst of seasonal flavors in your weeknight dinners, consider trying out these creative and delicious recipe ideas. Embrace the vibrant produce of the season by making a refreshing watermelon and feta salad. Simply toss together juicy watermelon cubes, tangy feta cheese, fresh mint leaves, and a drizzle of balsamic glaze for a light and flavorful side dish.

    To add a cozy touch to your meals, whip up a butternut squash and sage pasta. Roast cubes of butternut squash with olive oil and sage until caramelized, then toss them with al dente pasta and a sprinkle of Parmesan cheese. This dish is both comforting and full of autumn flavors.

    For a quick and nutritious dinner, try making a sheet pan honey mustard salmon with roasted Brussels sprouts and sweet potatoes. The combination of flaky salmon coated in a tangy honey mustard glaze alongside crispy roasted vegetables is sure to be a hit at the dinner table. Enjoy the seasonal bounty with these flavorful recipe ideas that are perfect for busy weeknights.

    Meal Prep Strategies

    Consider incorporating efficient meal prep strategies into your routine to streamline your weeknight dinner preparations and save time during busy evenings. Start by planning your meals for the week ahead. Dedicate some time on the weekend to chop vegetables, marinate proteins, or cook grains in advance. Prepping ingredients like these can significantly cut down your cooking time during the week.

    Another useful tip is to batch cook staple items that can be used in multiple dishes. For example, preparing a big batch of quinoa, roasted vegetables, or grilled chicken can serve as the base for various meals throughout the week. This not only saves time but also ensures you have healthy options readily available.

    Invest in quality storage containers to keep your prepped ingredients fresh for longer periods. Properly storing your prepped items can also help you stay organized and make assembling weeknight dinners a breeze. By implementing these meal prep strategies, you can simplify your cooking routine and enjoy delicious homemade meals with minimal effort.

    Kitchen Appliances

    [product_category category=”kitchen-appliances” per_page=”10″ columns=”2″ orderby=”date” order=”rnde”]

  • How Can You Create a Cozy Seating Arrangement for Entertaining?

    How Can You Create a Cozy Seating Arrangement for Entertaining?

    When it comes to setting up a cozy seating arrangement for entertaining, the key lies in the details. By carefully selecting the right furniture pieces, playing with textures, and strategically arranging seating to encourage conversation, you can elevate the ambiance of your space. But there’s more to consider beyond just the seating itself. Stay tuned to discover how adding cozy accessories and lighting can transform your gathering space into a warm and inviting oasis for your guests.

    Choosing the Right Furniture Pieces

    When selecting furniture for your cozy seating arrangement, prioritize comfort and style to create an inviting space for entertaining. Start by choosing a comfortable sofa or sectional that can accommodate your guests while also reflecting your personal style. Opt for plush cushions and soft upholstery to ensure that everyone feels relaxed and at ease during gatherings.

    Consider adding accent chairs to provide additional seating options and enhance the overall look of the space. Look for chairs that complement your main seating piece while adding a touch of visual interest. Coffee tables or ottomans can serve both functional and decorative purposes in your seating arrangement. These pieces can provide a surface for drinks and snacks, as well as a place to display decor items like books or candles.

    Remember to keep the layout of your furniture in mind to ensure that the seating arrangement promotes conversation and interaction among your guests. By combining comfort with style and thoughtful furniture placement, you can create a cozy and inviting space for entertaining in your home.

    Playing With Textures and Fabrics

    To enhance the cozy ambiance of your seating arrangement, explore a variety of textures and fabrics that will add depth and visual interest to the space. Mix and match different materials like plush velvet, soft chenille, smooth leather, or cozy knit throws to create a layered and inviting look. Consider incorporating throw pillows in contrasting textures, such as a furry accent pillow against a sleek satin one, to add dimension to your seating area.

    When selecting fabrics, opt for ones that not only look good but also feel comfortable. Choose upholstery that’s soft to the touch and pleasant to sit on for extended periods. Additionally, consider the durability of the fabrics, especially if you anticipate frequent use or have pets or children in the house.

    Experiment with combinations of textures and fabrics to find a balance that suits your style and creates a warm and inviting atmosphere for entertaining guests. Remember, the tactile experience of different materials can significantly contribute to the overall comfort and coziness of your seating arrangement.

    Arranging Seating for Conversation Flow

    Consider strategically positioning your seating to encourage natural conversation flow and interaction among guests. Start by creating cozy seating clusters rather than lining furniture against the walls. Arrange chairs and sofas facing each other to promote easy eye contact and communication. Opt for a circular or U-shaped seating arrangement to foster a sense of inclusivity and make it easier for everyone to participate in the conversation.

    When arranging your seating, take into account the size of your space and the number of guests you expect. Ensure there’s enough space between seats for people to move around comfortably. Integrate a mix of seating options, such as sofas, armchairs, and ottomans, to cater to different preferences and create a dynamic seating layout.

    To enhance conversation flow, consider placing side tables within reach of each seat for guests to place drinks or snacks. Additionally, add floor cushions or poufs for extra seating flexibility and to create a cozy atmosphere conducive to engaging discussions.

    Adding Cozy Accessories and Lighting

    Positioning your seating in cozy clusters also involves incorporating inviting accessories and lighting to enhance the ambiance further. Cozy accessories like plush throw blankets, soft accent pillows, and decorative rugs can instantly add warmth and comfort to your seating arrangement. Consider mixing and matching textures like faux fur or knitted blankets for a layered look that invites your guests to snuggle in and relax.

    To create a welcoming and intimate atmosphere, lighting plays a crucial role. Opt for soft, warm lighting with the use of table lamps, floor lamps, or string lights to create a cozy glow. Dimmer switches can also help you adjust the brightness to set the perfect mood for entertaining. Candles are another fantastic option to add a touch of elegance and coziness to your seating area.

    Home décor

    [product_category category=”home-decor” per_page=”10″ columns=”2″ orderby=”date” order=”rnde”]

  • A Beginner’s Guide to Taking Supplements for Weight Loss

    A Beginner’s Guide to Taking Supplements for Weight Loss

    As you embark on your weight loss journey, the prospect of incorporating supplements might seem enticing, yet it’s crucial to proceed with caution. By understanding key considerations such as aligning supplements with your goals and maintaining a focus on health, you can make informed choices. But what happens when the supplement market is flooded with options, making it challenging to navigate the terrain effectively?

    Types of Weight Loss Supplements

    When choosing weight loss supplements, prioritize effectiveness over popularity. With so many options on the market, it’s crucial to focus on what’ll work best for you. Fat burners are a common choice, designed to help increase your metabolism and burn more calories throughout the day. These supplements often contain ingredients like caffeine, green tea extract, or L-carnitine to support weight loss efforts.

    Another type of weight loss supplement is appetite suppressants. These can help you feel full faster, reducing your overall caloric intake. Ingredients like glucomannan, green tea extract, or soluble fibers are often found in these supplements. It’s important to remember that while these can be helpful, they work best when combined with a healthy diet and regular exercise routine.

    Lastly, carb blockers are supplements that aim to prevent your body from absorbing carbohydrates. By inhibiting certain enzymes, these supplements can potentially help you consume fewer calories from carbs. However, it’s essential to use these in moderation and consult with a healthcare professional before incorporating them into your routine. Always prioritize your health and safety when choosing weight loss supplements.

    How to Choose the Right Supplement

    To select the right supplement for your weight loss journey, focus on aligning the supplement’s benefits with your specific goals and needs. Start by identifying what you aim to achieve through supplementation. Are you looking to boost metabolism, control cravings, increase energy levels, or enhance fat burning? Understanding your objectives will help narrow down the options.

    Next, consider your individual preferences and any health conditions you may have. Some supplements may interact with medications or exacerbate certain health issues, so it’s crucial to consult with a healthcare provider before making a decision.

    Additionally, take the time to research different products and brands. Look for supplements that have been scientifically proven to be effective and safe. Reading reviews from other users can also provide valuable insights. When comparing supplements, pay attention to the ingredients and their dosages. Opt for products with transparent labeling and avoid those with potentially harmful additives.

    Remember that consistency and patience are key when incorporating supplements into your weight loss routine.

    Incorporating Supplements Into Your Routine

    Consider incorporating supplements into your routine gradually to assess their impact on your weight loss journey. Start by introducing one supplement at a time, rather than adding multiple all at once. This approach allows you to monitor how each supplement affects your body and weight loss efforts. Begin with a lower dosage to minimize the risk of potential side effects and gradually increase as needed. Consistency is key when taking supplements for weight loss, so establish a routine that works best for you.

    To make it easier to remember, you can incorporate taking your supplements into your daily habits, such as with meals or before a workout. Set reminders on your phone or leave the supplements in a visible spot to help you stay on track. Keep track of your progress, including any changes in weight, energy levels, or appetite. This information can help you determine the effectiveness of the supplements and make any necessary adjustments to your routine.

    Safety Tips for Taking Weight Loss Supplements

    Incorporate safety measures when taking weight loss supplements to protect your well-being and optimize results. First and foremost, always consult with a healthcare professional before starting any new supplement regimen, especially if you have existing health conditions or are taking medications. It’s crucial to follow the recommended dosage instructions provided by the manufacturer to prevent any potential adverse effects.

    Additionally, be cautious of supplements that make extravagant claims or promise rapid weight loss, as these could be harmful or ineffective. Read the ingredient list carefully and research each component to ensure they’re safe and have scientific backing for their weight loss properties. Look for supplements that have been tested by reputable third-party organizations for quality and purity.

    Keep track of any side effects you may experience and discontinue use if you notice any concerning symptoms. Lastly, remember that weight loss supplements are meant to complement a healthy diet and exercise routine, not replace them entirely. By prioritizing safety and being informed, you can make the most of your weight loss supplement journey.

    Health and fitness

    [product_category category=”health-and-fitness” per_page=”10″ columns=”2″ orderby=”date” order=”rnde”]

  • Baby Proofing Your Home: A Complete Checklist

    Baby Proofing Your Home: A Complete Checklist

    As you go through each room in your home, ensuring it’s safe for your little one is paramount. From securing electrical outlets to preventing falls on staircases, every corner requires careful attention. But what about the less obvious dangers lurking around your house? Stay tuned to discover some often overlooked areas that might need your immediate attention in order to create a truly baby-proofed environment.

    Kitchen Safety

    When baby proofing your home, make sure to pay special attention to kitchen safety to prevent accidents. Start by installing safety latches on all cabinets and drawers within reach. This will prevent your curious little one from getting into harmful substances or sharp objects. Keep all cleaning supplies and chemicals locked away in a high cabinet or secured with a childproof lock.

    Secure all low-hanging kitchen appliances, such as toasters and blenders, to prevent them from being pulled down. Store appliance cords out of reach to avoid any potential strangulation hazards. Always turn pot handles inward when cooking on the stove to prevent your child from grabbing them and causing spills or burns.

    Ensure that all sharp utensils are stored in a locked drawer or up high, away from tiny hands. Keep hot drinks and foods out of reach and never leave them unattended on the counter. By taking these simple precautions, you can create a safe kitchen environment for your little one to explore without worry.

    Bathroom Essentials

    To ensure a safe bathroom environment for your little one, prioritize securing medicine cabinets and toilet lids out of their reach. Store all medications, toiletries, and cleaning products in locked cabinets or high shelves. Childproof latches can prevent curious hands from accessing potentially harmful items. Remember to keep the toilet lid closed and consider installing a toilet lock to prevent drowning hazards.

    Additionally, cover sharp edges of countertops and install soft close mechanisms on drawers to prevent pinched fingers. Use non-slip mats in the bathtub and on the floor to avoid slips and falls. Adjust the water heater to a safe temperature to prevent burns. Ensure electrical outlets near water sources are equipped with ground fault circuit interrupters (GFCIs) to reduce the risk of electric shock.

    Regularly check for any leaks or mold growth in the bathroom to maintain a healthy environment for your little one. By implementing these bathroom safety measures, you can create a secure space for your child to explore and enjoy bathtime without unnecessary risks.

    Living Room Hazards

    Secure your living room by identifying and addressing potential hazards that could pose a danger to your child’s safety.

    Start by ensuring all electrical outlets are covered with safety plugs to prevent curious fingers from getting shocked.

    Secure heavy furniture such as bookshelves and TV stands to the wall to prevent tipping.

    Keep cords from blinds and curtains out of reach by using cord wind-ups or ties.

    Place cushiony edge guards on sharp corners of coffee tables and other furniture to prevent head injuries.

    Store away small items like coins, batteries, or any other choking hazards that might be within reach.

    Be mindful of plants that could be toxic and either move them out of reach or opt for non-toxic alternatives.

    Lastly, keep remote controls, small toys, and other small objects off the floor to prevent choking hazards.

    Bedroom Precautions

    To ensure your child’s safety in the bedroom, prioritize securing furniture and covering sharp edges to prevent accidents. Start by anchoring heavy dressers, bookshelves, and other tall furniture to the wall to prevent tip-overs. Use furniture straps or L-brackets for a secure attachment. Keep cribs, beds, and other furniture away from windows to avoid falls. Place safety gates at the entrance of the room to restrict access when needed.

    Cover sharp edges of furniture, such as bed frames, nightstands, and dressers, with corner guards to prevent injuries. Make sure electrical outlets are covered with outlet plugs to avoid electrical accidents. Keep cords from blinds or curtains out of reach to prevent strangulation hazards. Install window guards or stops to limit how far windows can be opened, reducing the risk of falls. Additionally, avoid placing small objects like toys or jewelry within reach of your child while in the bedroom.

    General Home Safety

    Ensure all rooms in your home are equipped with smoke detectors and carbon monoxide alarms for optimal safety. These devices are crucial in alerting you to potential dangers, allowing you to take immediate action to protect your family. Regularly test the alarms and replace batteries as needed to ensure they’re functioning correctly.

    Keep all sharp objects, choking hazards, and toxic substances out of reach of children. Secure heavy furniture and TVs to the wall to prevent tipping accidents. Use safety gates at the top and bottom of stairs to prevent falls.

    Check that all electrical outlets have outlet covers to prevent accidental shocks. Keep cords for blinds or curtains out of reach to avoid strangulation risks. Install window guards to prevent falls from open windows.

    Create a family emergency plan and ensure all family members are familiar with it. Include important contacts, evacuation routes, and designated meeting points. Practice fire drills regularly to ensure everyone knows what to do in case of an emergency.

    Baby products

    [product_category category=”baby-products” per_page=”10″ columns=”2″ orderby=”date” order=”rnde”]

  • The Benefits of Oil Treatments for Nourishing Your Hair

    The Benefits of Oil Treatments for Nourishing Your Hair

    When it comes to nourishing your hair, oil treatments can be a game-changer. Imagine a simple step that can boost hydration, strengthen your hair from the roots, and add a noticeable shine to your locks. The benefits of incorporating oils into your hair care routine go beyond just the surface. By delving deeper into the world of oil treatments, you might uncover a secret to achieving the healthy and vibrant hair you’ve always desired.

    Hydration and Moisture Boost

    To boost hydration and moisture in your hair, consider incorporating oil treatments into your hair care routine. Oils like coconut, argan, and jojoba are rich in nutrients that can help nourish and rejuvenate your hair. These treatments work by penetrating the hair shaft and sealing in moisture, leaving your locks feeling soft and looking shiny.

    When applying oil treatments, make sure to focus on the mid-lengths and ends of your hair, as these areas tend to be drier. You can either apply the oil directly to your hair or mix it into your conditioner for added hydration. Leave the treatment on for at least 30 minutes, or for a more intense treatment, wrap your hair in a warm towel and leave it on overnight.

    Regular oil treatments can’t only improve the overall hydration of your hair but also help reduce frizz and prevent breakage. By incorporating these treatments into your routine, you can achieve healthier, more moisturized hair that looks and feels great.

    Strengthens Hair Follicles

    Boost your hair’s strength and vitality by focusing on strengthening the hair follicles. Hair follicles play a crucial role in the overall health and appearance of your hair. By incorporating oil treatments into your hair care routine, you can provide essential nutrients that nourish and fortify the follicles, promoting stronger and healthier hair.

    Regular oil treatments help to improve blood circulation to the scalp, delivering vital nutrients directly to the hair follicles. This increased blood flow stimulates the follicles, promoting hair growth and preventing breakage. Stronger hair follicles are less prone to damage, resulting in thicker, fuller hair with improved resilience against external stressors.

    Oils such as coconut oil, argan oil, and castor oil are known for their ability to strengthen hair follicles. These oils contain vitamins, minerals, and fatty acids that penetrate the follicles, nourishing them from within. By regularly massaging these oils into your scalp, you can effectively strengthen your hair follicles and promote healthier, more resilient hair.

    Adds Luster and Shine

    Enhance your hair’s appearance with a radiant luster and shine using nourishing oil treatments. Oil treatments work wonders in adding a beautiful sheen to your locks, making them look healthy and vibrant. When your hair lacks shine, it can appear dull and lifeless. By incorporating oil treatments into your hair care routine, you can combat this issue and achieve glossy, luminous hair.

    The oils penetrate the hair shaft, moisturizing and smoothing the cuticles to reflect light better. This process helps to create a sleek surface that enhances the natural shine of your hair. Additionally, the nourishing properties of oils like coconut, argan, or jojoba oil can help repair damage and prevent further breakage, contributing to a glossy finish. Regularly treating your hair with oils not only adds luster but also improves overall hair health, making it more manageable and less prone to frizz.

    Say goodbye to dull hair and hello to a glossy, head-turning mane with the power of nourishing oil treatments.

    Improves Scalp Health

    Revitalize your scalp health by incorporating nourishing oil treatments, ensuring a strong foundation for healthy and vibrant hair. Oil treatments help to improve scalp health by moisturizing and nourishing the skin on your head.

    A healthy scalp is essential for promoting hair growth and preventing issues like dandruff and dryness. When you massage oil into your scalp, it helps to increase blood circulation, which in turn can stimulate hair follicles and encourage new growth.

    Additionally, oil treatments can help balance the natural oils on your scalp, preventing excess oil production that can lead to greasiness. By keeping your scalp moisturized and balanced, you create an optimal environment for your hair to thrive.

    Regular oil treatments can also soothe any irritation or inflammation on the scalp, providing relief for conditions like itchiness or sensitivity. Overall, improving your scalp health through oil treatments is a simple yet effective way to support the overall health and appearance of your hair.

    Beauty & Personal care
    [product_category category=”beauty-personal-care” per_page=”10″ columns=”2″ orderby=”date” order=”rnde”]

  • How Long Do Gaming Headsets Typically Last?

    How Long Do Gaming Headsets Typically Last?

    When it comes to gaming headsets, have you ever wondered about their lifespan and how long they typically endure? The longevity of gaming headsets is a topic of interest for many gamers, as these devices are crucial for an immersive gaming experience. Understanding the factors that influence the durability of gaming headsets can help you make informed decisions about your headset usage and maintenance. So, let’s explore the intriguing world of gaming headsets and uncover the secrets behind their typical lifespan.

    Average Lifespan of Gaming Headsets

    Gaming headsets typically last an average of 2-3 years with regular use and proper maintenance. To ensure your headset reaches its full lifespan, handling it with care is crucial. Avoid dropping or mishandling the headset, as these actions can lead to internal damage that may shorten its longevity.

    Regular cleaning is another essential aspect of maintaining your gaming headset. Wipe down the ear cups and headband with a soft, damp cloth to remove dirt and sweat that can accumulate over time. Additionally, keeping your headset in a clean and dust-free environment can prevent debris from entering the device and causing potential malfunctions.

    Proper storage is also key to prolonging your headset’s lifespan. When not in use, store it in a safe place away from extreme temperatures and humidity. This simple practice can prevent damage to the headset’s components and help it stay in optimal condition for longer.

    Factors Influencing Headset Longevity

    To maximize the longevity of your gaming headset, understanding the key factors that influence its lifespan is crucial. Proper care and maintenance play a significant role in how long your headset will last.

    Factors such as how often you clean your headset, the way you store it when not in use, and whether you follow manufacturer guidelines for upkeep can all impact its longevity. Additionally, the quality of the materials used in the construction of the headset can determine how durable it’s over time. Headsets made with higher quality materials tend to last longer than those made with cheaper components.

    Another factor to consider is how frequently you use your headset. Continuous, heavy usage can lead to quicker wear and tear compared to occasional use. Being mindful of these factors and taking proactive steps to care for your gaming headset can help extend its lifespan and ensure you get the most out of your investment.

    Signs Your Headset May Need Replacing

    If you notice crackling sounds, inconsistent audio quality, or one earpiece not working, it may be time to consider replacing your headset. These signs often indicate that your headset is starting to fail and may not deliver the same audio experience as before.

    Cracks or pops in the sound can be a sign of loose connections or damaged drivers within the headset. Inconsistent audio quality, where the sound cuts in and out or sounds distorted, could point to issues with the headset’s wiring or internal components.

    When one earpiece stops working entirely, it could be due to a faulty connection, speaker damage, or wiring problems. If you experience any of these issues, it’s advisable to start looking for a replacement headset to continue enjoying your gaming or audio experience without disruptions.

    Tips to Prolong Your Headset’s Lifespan

    To extend the lifespan of your headset, consider implementing proper care and maintenance practices. Start by storing your headset in a safe place when not in use. Avoid leaving it in extreme temperatures or humid environments that could damage the electronics. When cleaning your headset, use a soft, dry cloth to wipe away any dust or dirt gently. Avoid using harsh chemicals or liquids that could seep into the headset and cause internal damage.

    Additionally, be mindful of how you handle your headset. Avoid twisting or bending the cables excessively, as this can lead to fraying and connectivity issues over time. When adjusting the headband or microphone, do so gently to prevent any unnecessary strain on the headset’s components.

    It’s also essential to unplug your headset properly after each use. Yanking the cables out forcefully can damage the connectors and compromise the overall functionality of your headset. By following these simple tips, you can help prolong the lifespan of your gaming headset and enjoy crisp audio for many gaming sessions to come.

    Gaming

    [product_category category=”gaming” per_page=”10″ columns=”2″ orderby=”date” order=”rnde”]

  • The Art of Mixing Textures in Garden Design

    The Art of Mixing Textures in Garden Design

    When it comes to designing your garden, mastering the art of mixing textures is like creating a symphony of visual interest. Picture the interplay of soft petals brushing against rough bark or the contrast of feathery leaves next to spiky succulents. These textural combinations evoke a harmonious balance that can transform your outdoor space into a dynamic and captivating oasis. But how do you achieve this delicate equilibrium of textures? Stay tuned to unravel the secrets behind crafting a sensory-rich garden that beckons you to explore further.

    Importance of Texture Variety

    To create visual interest and depth in your garden design, incorporate a rich variety of textures in your plant selection. Mixing textures is key to creating a dynamic and visually appealing landscape. By combining plants with different textures, such as smooth leaves next to spiky ones or delicate flowers near coarse foliage, you can add intrigue and complexity to your garden.

    Including a range of textures not only enhances the aesthetic appeal but also stimulates other senses. Imagine running your hands through the velvety leaves of lamb’s ear or brushing past the rough bark of a tree; these tactile experiences add another dimension to your garden enjoyment.

    Moreover, diverse textures can play with light and shadow, creating interesting patterns throughout the day. The way light interacts with glossy, matte, or fuzzy surfaces can transform the look of your garden, making it a delightful place to explore and relax. So, when planning your garden design, remember that texture variety is a powerful tool to elevate your outdoor space.

    Choosing Complementary Textures

    Enhance your garden’s visual appeal by strategically selecting plants with complementary textures that interact harmoniously. When choosing complementary textures for your garden, consider pairing fine-textured plants with coarser ones to create a balanced composition. For instance, delicate ferns can be paired with robust succulents to provide a visually interesting contrast. Mixing soft, velvety leaves with spiky or rough foliage adds depth and complexity to your garden design.

    Incorporating a variety of textures can also help create focal points within your garden. Place plants with bold, large textures in prominent areas to draw the eye and create visual interest. Contrast smooth, glossy leaves with fuzzy or matte surfaces to add intrigue and dimension to your garden beds.

    Additionally, consider the tactile experience of your garden. Incorporating plants with a range of textures invites visitors to interact with your garden on a sensory level. Texture can evoke feelings of tranquility, excitement, or curiosity, enhancing the overall experience of your outdoor space. By carefully selecting plants with complementary textures, you can create a harmonious and visually captivating garden design.

    Incorporating Contrasting Elements

    Introduce a subtle touch of drama to your garden by skillfully integrating contrasting elements in your plant selection. By combining plants with different textures, colors, and shapes, you can create a visually striking and dynamic landscape. Consider pairing smooth, glossy leaves with rough, textured foliage to add depth and interest to your garden beds. Mix bold, spiky plants like yuccas or agaves with delicate, feathery ferns for a harmonious contrast that draws the eye.

    Incorporating contrasting elements extends beyond just plants. Integrate different hardscape materials like smooth stone pathways against rough-hewn wooden fences or metal sculptures amidst soft grassy areas. These juxtapositions create a sensory experience that engages both sight and touch, making your garden a captivating space to explore.

    Practical Tips for Textural Harmony

    Create a cohesive garden design by carefully balancing textures to achieve visual harmony and interest. Start by selecting a primary texture, such as rough stone or smooth grass, as the foundation for your design. Then, add complementary textures like soft foliage or delicate flowers to create contrast and depth. Consider the scale of textures – mix large leaves with fine, intricate patterns to add complexity without overwhelming the space.

    When choosing plants, think about their textures throughout the seasons. Incorporate evergreen shrubs for year-round interest and mix in seasonal bloomers for variety. Don’t forget about hardscaping elements like pathways, walls, or decorative features – these can introduce different textures that tie the whole design together.

    To maintain balance, avoid overcrowding textures in one area. Instead, distribute them evenly throughout the garden to create a harmonious flow. Lastly, don’t be afraid to experiment and make adjustments as needed to achieve the perfect textural harmony in your garden design.

    Garden

    [product_category category=”garden” per_page=”10″ columns=”2″ orderby=”date” order=”rnde”]

  • What’s the Best Way to Remove Pet Hair From Car Seats?

    What’s the Best Way to Remove Pet Hair From Car Seats?

    When it comes to dealing with pet hair on your car seats, you want a method that is efficient and practical. There are various tools and techniques available that can make the task easier, but which one truly stands out as the best solution? From specialized brushes to innovative DIY hacks, finding the most effective way to remove pet hair from car seats may surprise you. So, what exactly is the ultimate method that will leave your car seats looking clean and fur-free?

    Tools You’ll Need

    Wondering what tools you’ll need to tackle pet hair removal from your car seats?

    The key to effectively removing pet hair is having the right tools at your disposal. Firstly, invest in a high-quality lint roller or pet hair remover brush. These tools are efficient at grabbing onto pet hair and pulling it away from the fabric of your car seats.

    Additionally, a pair of rubber gloves can work wonders. Simply dampen the gloves and run your hands over the seats to gather the hair into manageable clumps.

    Another essential tool is a handheld vacuum cleaner with a brush or rubber nozzle attachment. This will help you suction up the loosened pet hair quickly and easily.

    For stubborn hair that’s deeply embedded in the seats, a squeegee can be surprisingly effective. Just spray a mixture of water and fabric softener onto the seats, then use the squeegee to scrape off the hair.

    These tools, when used in combination, will make the task of removing pet hair from your car seats much more manageable.

    Effective Vacuuming Techniques

    To effectively remove pet hair from your car seats, master the art of vacuuming with these proven techniques. Start by using a vacuum with strong suction power and a brush attachment. Begin by vacuuming the seats in a back-and-forth motion, ensuring you reach all crevices where pet hair may be hiding. Use short strokes and overlap your passes to catch as much hair as possible.

    For stubborn pet hair that’s deeply embedded in the fabric, try lightly misting the seats with water or a fabric softener mixed with water. This can help loosen the hair, making it easier to vacuum up. Additionally, consider using a rubber squeegee or a rubber glove to gather hair into clumps for easier removal.

    Remember to empty the vacuum frequently to maintain its suction power. Repeat the vacuuming process until no more hair is being collected. By following these effective vacuuming techniques, you can say goodbye to pesky pet hair in your car seats.

    DIY Pet Hair Removal Solutions

    Consider utilizing common household items to tackle pet hair in your car seats effectively. One DIY solution is using a rubber glove or latex glove. Simply dampen the glove with water, then run your hand over the car seat surface. The pet hair will stick to the glove, making it easy to gather and dispose of.

    Another option is to use a squeegee – the rubber edge can help lift the pet hair from the seats. Just glide the squeegee across the upholstery to collect the hair into a clump for easy removal.

    Additionally, a balloon can be surprisingly effective. Rubbing a balloon over the seats creates static electricity, attracting the pet hair and making it easier to gather.

    If you don’t have a squeegee or balloon, try using duct tape or packing tape. Wrap it around your hand with the sticky side out and press it onto the seats to pick up the pet hair. These simple DIY solutions can make pet hair removal a breeze.

    Preventing Future Build-Up

    How can you maintain a pet hair-free car interior for longer periods?

    One effective way to prevent future build-up of pet hair in your car is by using protective covers. Invest in seat covers specifically designed to resist pet hair. These covers act as a barrier, making it easier to remove hair and keeping your car seats clean.

    Additionally, consider using a pet seat belt or carrier to limit your pet’s movement during car rides, reducing the spread of hair. Regularly grooming your pet can also help minimize shedding, resulting in less hair in your car. Another tip is to brush your pet before car trips to remove loose hair.

    Vacuuming your car frequently, using a pet-specific vacuum attachment, can help pick up any stray hairs before they become deeply embedded. Lastly, consider using anti-static spray on car seats to repel pet hair.

    Automotive & Tools

    [product_category category=”automotive-tools” per_page=”10″ columns=”2″ orderby=”date” order=”rnde”]

  • Laptops With the Best Keyboards for Typing Comfort

    Laptops With the Best Keyboards for Typing Comfort

    If typing comfort is a priority for you, finding the right laptop with a top-notch keyboard can make all the difference in your daily productivity. Imagine effortlessly gliding through your work with each keystroke, feeling like a true typing maestro. But which laptops offer the best keyboards for this typing nirvana? Stay tuned to discover the top contenders in keyboard comfort, the key features that set them apart, and how ergonomic design plays a crucial role in enhancing your overall typing experience. Get ready to elevate your typing game to a whole new level!

    Top Contenders in Keyboard Comfort

    When choosing a laptop for comfortable typing, consider the top contenders in keyboard comfort for an optimal typing experience.

    The first contender known for its exceptional keyboard comfort is the Lenovo ThinkPad series. With their well-spaced keys and satisfying key travel, ThinkPad keyboards provide a tactile typing experience that many users swear by.

    Another strong competitor in the realm of keyboard comfort is the Apple MacBook Pro. Its butterfly mechanism keys offer a responsive and precise typing feel, ideal for long typing sessions.

    If you prefer a Windows laptop, the Microsoft Surface Laptop line is worth considering. These laptops feature Alcantara fabric-covered keyboards that are soft to the touch and comfortable for extended use.

    Lastly, the HP Spectre x360 is also a standout choice, offering a backlit keyboard with good key travel and responsiveness. When prioritizing comfort in typing, these top contenders should be at the forefront of your considerations.

    Keyboard Features Comparison

    To compare the keyboard features of different laptops, assess key aspects such as key layout, key travel, and typing feedback.

    The key layout refers to the arrangement of keys on the keyboard, with some laptops offering full-sized layouts while others may have compact designs.

    Key travel is the distance a key moves when pressed, impacting the typing experience by providing tactile feedback. Laptops with deeper key travel often offer a more satisfying typing feel compared to those with shallow key travel.

    Typing feedback relates to the responsiveness of the keys and the auditory or tactile cues they provide while typing. Some keyboards offer quieter typing experiences, while others have more audible feedback.

    Additionally, consider the presence of backlighting, which can enhance visibility in low-light environments. When comparing keyboard features, prioritize a layout that suits your typing style, key travel that provides comfort, and feedback that aligns with your preferences for an optimal typing experience.

    Ergonomic Design for Typing Bliss

    Ergonomic design plays a crucial role in ensuring comfortable typing experiences on laptops. When choosing a laptop for typing bliss, consider features like a comfortable palm rest that supports your wrists to prevent strain. A keyboard with well-spaced keys reduces the chances of typos and promotes faster typing speeds. Look for laptops with adjustable tilt angles to find a position that suits your typing style best.

    Additionally, keyboards with a slight curve or split design can help maintain a more natural hand position, reducing the risk of repetitive strain injuries. Some laptops offer customizable keystroke feedback, allowing you to adjust the key resistance to your preference. This feature can enhance your typing comfort over extended periods.

    Remember to pay attention to the key travel distance, as keys with a deeper press can provide a more satisfying typing experience. Ultimately, choosing a laptop with ergonomic design features tailored to your typing habits can significantly impact your overall comfort and productivity.

    User Reviews and Recommendations

    Wondering what users have to say about laptops with comfortable keyboards? User reviews and recommendations can provide valuable insights into the typing experience offered by different laptops. Many users praise laptops like the Lenovo ThinkPad series for their comfortable and responsive keyboards that make long typing sessions a breeze. Acer Swift laptops are also highly rated for their well-spaced keys and good key travel, promoting a comfortable typing experience.

    On the other hand, some users find laptops like the Apple MacBook Pro to have shallower keys that may not suit everyone’s typing preferences.

    When considering user reviews, it’s essential to look for patterns and common themes among different opinions. Look out for feedback on key travel, key spacing, and overall typing comfort to gauge whether a particular laptop’s keyboard would meet your needs. Keep in mind that personal preferences vary, so what works well for one user may not be ideal for another.

    Reading user reviews can help you make an informed decision when choosing a laptop with a comfortable keyboard.

    Tech products

    [product_category category=”tech-products” per_page=”10″ columns=”2″ orderby=”date” order=”rnde”]