Category: Automotive

  • DIY Solutions for Removing Minor Scratches From Car Paint

    DIY Solutions for Removing Minor Scratches From Car Paint

    You’ve noticed some minor scratches on your car’s paint job, and now you’re wondering how to tackle them efficiently. While there are DIY solutions available, it’s crucial to understand the depth and severity of the scratches before diving in. Some scratches may be easily remedied with simple techniques, but others might require more specialized attention. By following a systematic approach and utilizing the right tools, you can restore your car’s paint and bring back its original shine. So, how can you effectively address those pesky scratches and make your car look flawless once again?

    Assessing the Scratch Severity

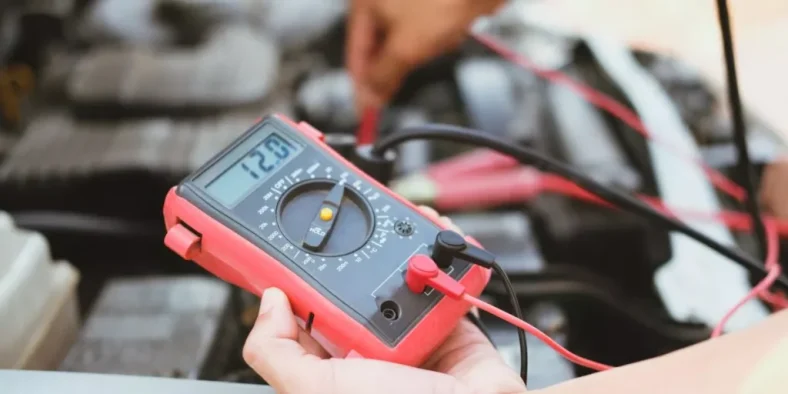
    To determine the severity of a scratch on your car’s paint, start by carefully examining the depth and length of the mark. Run your finger gently over the scratch. If your nail catches on it, the scratch may be deeper and more challenging to repair. Next, assess the length of the scratch. A longer scratch may require more extensive treatment compared to a shorter one. Look at the edges of the scratch; if they’re rough and jagged, it might indicate a deeper cut into the paint.

    Inspect the surrounding area for any signs of paint transfer. If you notice color from another object on your car, it’s likely that the scratch is superficial and can be easily fixed. Additionally, check for any signs of rust or corrosion around the scratch. Rust indicates that the scratch has penetrated through the paint and primer, reaching the metal underneath. Understanding the severity of the scratch will help you determine the appropriate method for repairing it.

    Gathering Necessary Supplies

    You’ll need specific supplies to effectively remove scratches from your car’s paint. The first item you should have on hand is a car scratch removal product, which can be found at most auto parts stores or online. These products typically come in the form of a rubbing compound or a scratch repair kit. Additionally, you’ll need a clean microfiber cloth to apply the scratch removal product and buff the affected area.

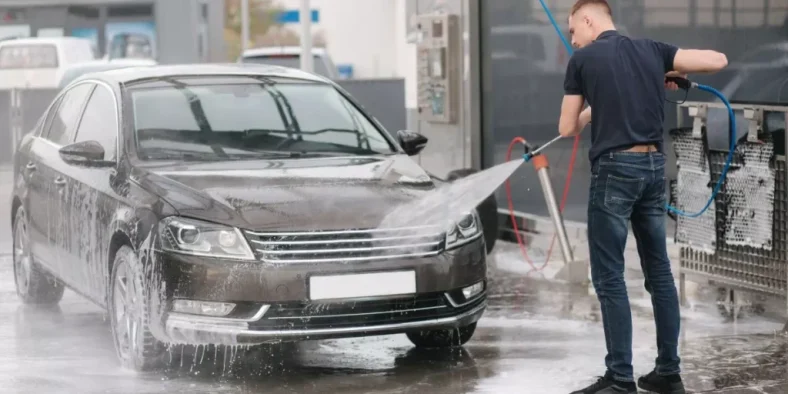
    To ensure a smooth application process, it’s recommended to have some water and mild soap to clean the scratched area before starting the repair. This will remove any dirt or debris that could interfere with the scratch removal process. Another essential supply is a wax or sealant to protect the newly repaired area and restore the shine to your car’s paint.

    Lastly, having a pair of gloves to protect your hands during the process is advisable. Gathering these supplies beforehand will make the scratch removal process more efficient and help you achieve better results.

    Applying DIY Scratch Removal Methods

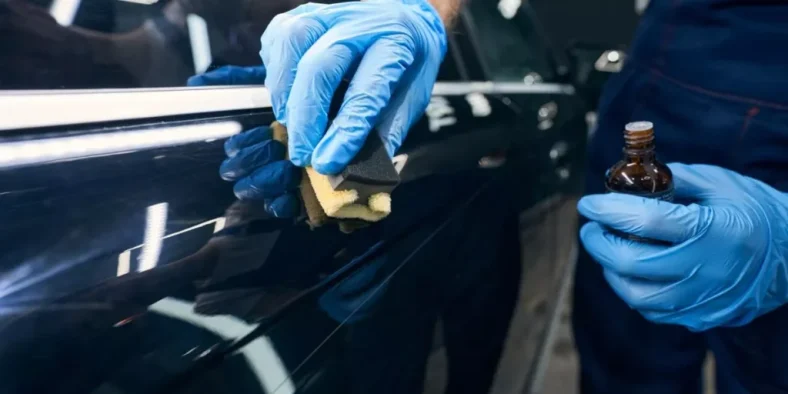
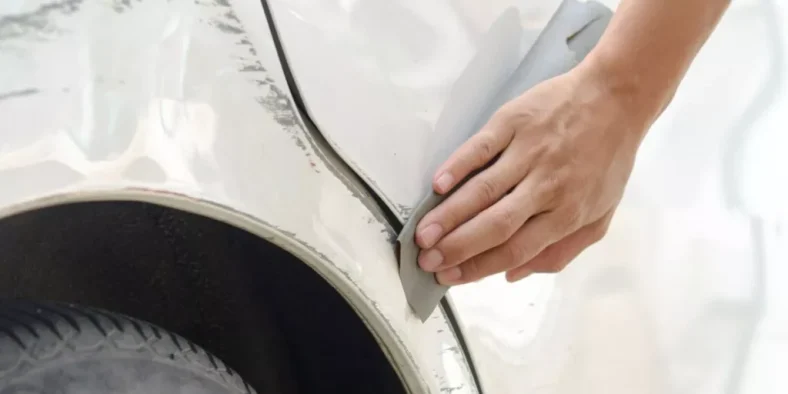
    Consider using a high-quality car scratch removal product for optimal results when applying DIY scratch removal methods. Start by thoroughly cleaning the scratched area with a mild soap and water, ensuring there’s no dirt or debris that could worsen the scratch.

    Follow the instructions on the scratch removal product, applying it gently in a circular motion over the scratch. Use a microfiber cloth to buff the product into the scratch, working it in until the scratch starts to fade. It may take several applications to completely remove the scratch, so be patient and continue the process until you’re satisfied with the results.

    If the scratch is deeper, you may need to use a touch-up paint that matches your car’s color. Apply the touch-up paint carefully to fill in the scratch, following up with a clear coat to protect the area. Remember to let the paint dry completely before buffing and polishing the area to blend it in with the rest of the paint.

    Finishing Touches and Maintenance

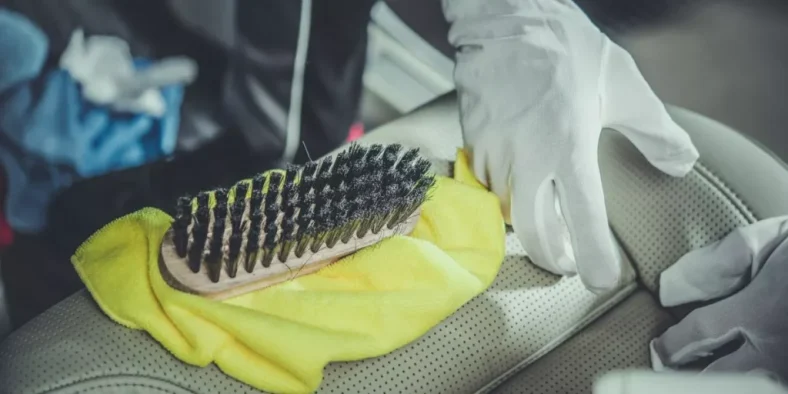
    For a professional-looking finish, ensure you carefully polish the treated area after removing the scratch. Use a clean microfiber cloth and a quality car polish to buff the area in a circular motion. This step helps blend the treated spot with the surrounding paint, giving it a seamless appearance.

    After polishing, apply a coat of wax to protect the newly treated area and enhance the overall shine of your car’s paint. Choose a high-quality carnauba wax or synthetic sealant for long-lasting protection against environmental elements.

    To maintain the polished and waxed finish, wash your car regularly with a pH-balanced car wash soap and avoid using harsh chemicals or abrasive materials that can damage the paint. Additionally, consider applying a fresh coat of wax every few months to keep your car looking its best.

    Automotive & Tools

    [product_category category=”automotive-tools” per_page=”10″ columns=”2″ orderby=”date” order=”rnde”]

  • What Are the Best Ways to Organize Your Car’s Interior?

    What Are the Best Ways to Organize Your Car’s Interior?

    When it comes to organizing your car’s interior, it’s essential to consider various storage solutions and practical tips to keep everything in place and easily accessible while on the go. From seatback pockets to trunk organizers and cable organizers, there are numerous ways to streamline your car’s interior. But that’s just the beginning; there are also maintenance and customization aspects to explore that can further elevate your driving experience. Ready to transform your car into a well-organized and personalized space that suits your needs?

    Essential Storage Solutions

    When organizing your car’s interior, maximize space by utilizing essential storage solutions. Look for versatile organizers like seatback pockets, trunk organizers, and console trays to keep your belongings in order.

    Seatback pockets are perfect for storing small items like tissues, sunglasses, or water bottles within easy reach. Trunk organizers are ideal for keeping groceries, sports equipment, or emergency supplies secure and organized in the trunk. Console trays help you keep track of loose change, charging cables, or keys, preventing them from rolling around while driving.

    Consider investing in collapsible bins or caddies to contain items that tend to clutter your car. These bins can be easily folded and stored when not in use, allowing you to adapt to changing storage needs. Additionally, using hooks or nets to secure larger items like bags or umbrellas can prevent them from sliding around in the trunk or backseat.

    Practical Organization Tips

    To efficiently organize your car’s interior, implement practical organization tips that will enhance functionality and convenience on the road. Start by using organizers like car seat organizers, trunk organizers, and console organizers to keep items in their designated places and prevent clutter.

    Utilize storage solutions such as seatback pockets, overhead storage compartments, and under-seat storage boxes to maximize space and keep frequently used items within easy reach.

    Consider using cable organizers to keep charging cords and cables neatly organized and prevent tangling. Use trash cans or bags to maintain cleanliness and avoid accumulating garbage in your car. Additionally, invest in a car trash holder that can be easily emptied to keep your vehicle tidy.

    Label storage containers or compartments to quickly locate items when needed. Utilize hooks or hangers to hang bags, grocery items, or clothing to prevent them from sliding around while driving. Implementing these practical organization tips won’t only keep your car tidy but also make your driving experience more pleasant and stress-free.

    Maintenance and Cleaning Advice

    For a well-maintained and clean car interior, regularly schedule cleaning sessions to ensure a tidy and fresh driving environment. Begin by decluttering your car, removing any unnecessary items that may have accumulated.

    Use a handheld vacuum or car-specific vacuum attachment to clean the seats, floors, and crevices where dirt and debris tend to hide. Wipe down all surfaces with a microfiber cloth and a gentle cleaner suitable for your car’s interior materials. Pay special attention to areas like cup holders, dashboard, and door panels.

    To prevent odors, consider using car-specific air fresheners or odor eliminators. Remember to empty trash promptly and avoid leaving food or drinks in the car for extended periods. For fabric upholstery, spot clean any stains promptly to prevent them from setting in. Regularly washing and conditioning leather seats can help maintain their appearance and prevent cracks.

    Lastly, don’t forget about the exterior – keeping the outside clean can also contribute to a fresh overall feel when you step into your car.

    Customization Ideas

    Consider enhancing your car’s interior with creative customization ideas to personalize your driving space. Start by adding custom seat covers that not only protect your seats but also reflect your style. Choose from a variety of materials, colors, and patterns to match your personality. Another great customization idea is to install specialized floor mats that are easy to clean and provide extra protection against dirt and spills.

    You can also invest in a steering wheel cover that not only adds a pop of color but also improves your grip while driving. Adding custom lighting features, such as LED strips or ambient lighting, can create a cool and personalized atmosphere inside your car.

    Personalized decals or stickers can be a fun way to showcase your interests or hobbies. Whether you prefer minimalistic designs or bold statements, there are endless options to choose from. Lastly, consider adding storage organizers or custom accessories to keep your essentials neatly organized and easily accessible. Customizing your car’s interior is a fun way to make your driving experience more enjoyable and unique to you.

    Automotive & Tools

    [product_category category=”automotive-tools” per_page=”10″ columns=”2″ orderby=”date” order=”rnde”]

  • The Ultimate Guide to Using a Multimeter for Car Electrical Systems

    The Ultimate Guide to Using a Multimeter for Car Electrical Systems

    When it comes to troubleshooting car electrical systems, mastering the art of using a multimeter is key. By understanding how to select the right settings and interpret the results accurately, you can unravel complex issues that may be affecting your vehicle’s performance. From checking battery health to pinpointing elusive shorts, a multimeter is your trusted ally in the realm of automotive diagnostics. Are you ready to elevate your electrical troubleshooting skills and unlock the secrets hidden within your car’s wiring system?

    Multimeter Basics for Beginners

    Are you wondering how to use a multimeter to check your car’s electrical systems efficiently?

    Multimeters are essential tools for diagnosing and troubleshooting electrical issues in your vehicle. To begin, set your multimeter to the voltage setting appropriate for the system you’re testing.

    When measuring voltage, always connect the red probe to the positive terminal and the black probe to the negative terminal. If you’re testing continuity, switch the multimeter to the continuity setting and connect the probes to the two points you want to check. A beep indicates a complete circuit.

    For checking resistance, switch to the resistance setting and connect the probes to the component you’re testing. A high resistance reading could indicate a faulty part. Remember to always disconnect the battery before testing to avoid any accidents.

    Testing Car Batteries

    To test car batteries effectively, set your multimeter to the DC voltage setting appropriate for battery testing. Make sure your car is turned off before proceeding.

    Begin by connecting the red probe to the battery’s positive terminal and the black probe to the negative terminal. The multimeter should display the voltage of the battery. A healthy battery typically reads around 12.6 volts. If the reading is significantly lower, it may indicate a weak battery that needs recharging or replacing.

    Additionally, you can perform a load test by turning on the headlights for a few minutes and then rechecking the voltage. If the voltage drops below 9.6 volts, the battery may be faulty.

    Regularly testing your car battery can help prevent unexpected breakdowns and ensure reliable performance. Remember to always handle car batteries with caution to avoid injury.

    Diagnosing Electrical Shorts

    When diagnosing electrical shorts in a car, start by disconnecting the battery to ensure safety. Electrical shorts can cause various issues like blown fuses, malfunctioning electronics, or even fires.

    To diagnose a short, set your multimeter to measure resistance (ohms) and check for continuity between the positive and negative terminals of the circuit suspected of having a short. If the multimeter reads zero resistance, there’s a short in the circuit.

    Next, inspect the wiring harness for any visible damage, frayed wires, or exposed metal that could be causing the short. You can also use the multimeter to check for continuity along the wiring harness to pinpoint the exact location of the short.

    Once you locate the short, repair or replace the damaged wiring to resolve the issue. Remember to reconnect the battery only after all repairs are complete to avoid any safety hazards.

    Troubleshooting Car Lighting Issues

    When troubleshooting car lighting issues, start by checking the bulbs for any signs of damage or burnout. Ensure that the bulbs are properly seated in their sockets and that the connections are secure. If the bulbs appear to be in good condition, the next step is to inspect the fuse related to the lighting circuit. A blown fuse can often be the culprit behind malfunctioning lights.

    Use a multimeter to test the fuse for continuity. If the fuse is intact, proceed to examine the wiring for any visible damage or loose connections. Corrosion or frayed wires can disrupt the flow of electricity to the lights. Additionally, consider testing the light switch to confirm that it’s functioning correctly. Sometimes a faulty switch can prevent the lights from turning on.

    Automotive & Tools

    [product_category category=”automotive-tools” per_page=”10″ columns=”2″ orderby=”date” order=”rnde”]

  • The Ultimate Checklist for Comprehensive Car Care

    The Ultimate Checklist for Comprehensive Car Care

    When it comes to taking care of your car, staying on top of maintenance tasks is crucial. From changing oil to inspecting brakes, each step plays a vital role in keeping your vehicle running smoothly. However, there’s more to comprehensive car care than just routine maintenance. Safety checks and interior and exterior care are equally significant in ensuring your car’s longevity and performance. But, there’s a hidden gem in this checklist that often gets overlooked, a simple yet essential step that can make a significant difference in your car’s overall well-being.

    Regular Maintenance Tasks

    Keeping your vehicle in top condition requires a consistent schedule of maintenance tasks. One of the most critical tasks is changing your oil regularly. This helps ensure that your engine stays properly lubricated, reducing wear and tear.

    Additionally, checking and replacing air filters is crucial for optimal engine performance and fuel efficiency. Don’t forget about your tires – maintaining proper air pressure and tread depth not only enhances safety but also improves fuel economy.

    Regularly inspecting your brakes is vital for your safety on the road. Ensuring that brake pads and fluid are in good condition can prevent accidents.

    Another essential maintenance task is checking your battery. Corrosion and loose connections can lead to starting issues, so it’s important to keep your battery in top shape.

    Lastly, scheduling routine inspections with a mechanic can help catch potential issues early, saving you time and money in the long run. By staying on top of these regular maintenance tasks, you can prolong the life of your vehicle and drive with peace of mind.

    Essential Safety Checks

    Regularly conducting essential safety checks on your vehicle ensures optimal performance and safeguards your well-being on the road. Start by checking your tire pressure and tread depth to maintain traction and prevent blowouts.

    Inspect your brakes for any signs of wear, such as squeaking or grinding noises, and ensure that all lights are working correctly, including headlights, brake lights, and turn signals. It’s crucial to examine your windshield wipers for any damage and replace them if they aren’t clearing the windshield effectively.

    Additionally, make sure your seatbelts are functioning correctly and that there are no visible signs of damage. Checking your fluid levels, including oil, coolant, and brake fluid, is essential for your vehicle’s overall health.

    Lastly, inspect your car’s emergency kit to ensure it’s well-stocked with essentials like a flashlight, first aid supplies, and jumper cables.

    Interior and Exterior Care

    Maintain the cleanliness and appearance of your vehicle’s interior and exterior to preserve its value and enhance your driving experience. Regularly vacuuming the interior, wiping down surfaces, and cleaning the windows not only keeps your car looking great but also helps prevent wear and tear. Consider using protective products for the dashboard and seats to maintain their condition over time. Additionally, addressing any exterior dirt or grime by washing and waxing your car can protect the paint and metal from corrosion.

    Inspect the exterior for any signs of damage, such as dents or scratches, and address them promptly to prevent rusting. Pay attention to the condition of your tires, ensuring they’re properly inflated and have sufficient tread depth for safe driving. Don’t forget about the lights – clean them regularly to maintain optimal brightness for visibility on the road. Taking care of both the interior and exterior of your vehicle won’t only make it more enjoyable to drive but also help retain its value in the long run.

    Additional Tips for Car Care

    For optimal car care, prioritize checking and replacing your engine oil regularly to ensure smooth performance and longevity of your vehicle. Engine oil lubricates the moving parts of your engine, reducing friction and preventing wear and tear. It’s essential to follow the manufacturer’s recommendations for oil change intervals based on your driving habits and the type of oil you use.

    In addition to oil maintenance, keeping your tires properly inflated is crucial for safety, fuel efficiency, and tire longevity. Check your tire pressure monthly and before long trips, including the spare tire if you have one. Inspect tires for signs of wear and replace them when the tread is worn down to ensure good traction on the road.

    Regularly inspecting and replacing air filters can improve engine performance and fuel efficiency. Clogged filters can restrict airflow, leading to decreased power and increased fuel consumption. Follow the manufacturer’s guidelines on when to change air filters based on your driving conditions.

    Automotive & Tools

    [product_category category=”automotive-tools” per_page=”10″ columns=”2″ orderby=”date” order=”rnde”]

  • Best Practices for Using Power Tools in Car Maintenance

    Best Practices for Using Power Tools in Car Maintenance

    When it comes to using power tools in car maintenance, ensuring you have the right safety measures in place is crucial. From protective gear to a well-lit workspace, taking these precautions can make all the difference in your repair tasks. But that’s just the beginning; there are key considerations that can elevate your efficiency and effectiveness in handling power tools for car maintenance.

    Safety Precautions

    To ensure your safety while using power tools for car maintenance, always wear protective gear. Safety goggles will shield your eyes from debris, while gloves will protect your hands from cuts and burns. Additionally, ear protection is crucial to prevent hearing damage from the loud noises generated by power tools.

    Before starting any work, make sure the area is well-lit and free of clutter to avoid accidents. Keep your workspace organized, with tools properly stored when not in use. It’s also essential to read the user manual of each power tool carefully to understand its proper operation and safety features.

    When operating power tools, maintain a firm grip and focus on the task at hand. Avoid distractions and never leave a tool running unattended. If a tool malfunctions or shows signs of damage, stop using it immediately and have it inspected by a professional. By following these safety precautions, you can reduce the risk of accidents and injuries while working on your car.

    Tool Selection

    When selecting tools for car maintenance, prioritize quality over quantity to ensure efficient and effective repairs. Investing in high-quality tools may initially seem more expensive, but in the long run, they’ll save you time and money by providing consistent performance and lasting durability. Look for reputable brands known for their reliability and durability in the automotive industry.

    Opt for tools with ergonomic designs that enhance comfort and reduce fatigue during use, especially for tasks that require prolonged periods of handling. Consider the specific needs of your car make and model when building your tool collection to ensure you have the right tools for the job. Versatile tools that can serve multiple purposes can also be a valuable addition to your toolkit, maximizing efficiency and reducing clutter.

    Regularly inspect your tools for wear and damage, and replace or repair them as needed to maintain their effectiveness and safety. By carefully selecting high-quality tools tailored to your car maintenance requirements, you can streamline your repair process and achieve professional results.

    Maintenance Tips

    Prioritize regular maintenance checks to keep your vehicle running smoothly and prevent costly repairs in the future. Set a schedule to inspect essential components such as the oil levels, filters, belts, hoses, and tires. Regularly changing the oil and oil filter can significantly extend your engine’s lifespan. Check the air filter and replace it if it’s dirty to ensure optimal engine performance. Keep an eye on the condition of your vehicle’s belts and hoses, as worn-out ones can lead to breakdowns. Additionally, inspecting tire pressure and tread depth is crucial for safety and fuel efficiency. Don’t forget to examine the brakes for wear and tear and address any issues promptly.

    When conducting maintenance, use power tools that are appropriate for the task at hand. For example, an impact wrench can make changing tires quicker and easier. Always follow safety precautions and manufacturer recommendations when using power tools for maintenance tasks. By staying proactive with maintenance checks and using the right tools, you can avoid unexpected breakdowns and costly repairs down the road.

    Efficiency Techniques

    Regularly using power tools designed for specific car maintenance tasks can significantly improve your efficiency and overall workflow. When working on your car, organizing your tools in a way that’s easily accessible can save you valuable time searching for the right equipment. Prioritize keeping your tools well-maintained and sharp to ensure they function effectively and make your tasks easier to complete. Additionally, investing in high-quality power tools can lead to better performance and durability, ultimately saving you time and money in the long run.

    Another efficiency technique is to plan out your tasks in advance. By creating a checklist of maintenance procedures and gathering all the necessary tools and parts beforehand, you can streamline your workflow and minimize interruptions. Furthermore, familiarizing yourself with the proper operation of each power tool can help you work more efficiently and safely. Practice using the tools correctly to increase your speed and precision, allowing you to complete car maintenance tasks with ease and confidence.

    Automotive & Tools

    [product_category category=”automotive-tools” per_page=”10″ columns=”2″ orderby=”date” order=”rnde”]

  • What Are the Tips for Creating Custom Interior Lighting?

    What Are the Tips for Creating Custom Interior Lighting?

    When creating custom interior lighting, don’t underestimate the impact of understanding your space—it’s the foundation for a successful design. Choosing the right fixtures is more than just about function; it’s about weaving them seamlessly into the aesthetic tapestry of your room. Layering light can transform a space, but there’s a key element missing that ties it all together. Keep reading to discover how incorporating smart lighting technology can elevate your design to a whole new level.

    Understanding Your Space

    Assess the size and layout of your room to determine the best lighting solutions. Consider the natural light sources available, such as windows or skylights, to optimize your lighting design. Ensure that your lighting choices complement the room’s dimensions and purpose. For example, task lighting is essential in work areas, while ambient lighting creates a cozy atmosphere in living spaces.

    Take note of any specific areas that require focused lighting, like reading nooks or artwork displays. Additionally, think about the color scheme and furniture placement in your room, as these factors can influence the effectiveness of your lighting.

    Choosing the Right Fixtures

    When selecting fixtures for your custom interior lighting, consider the functionality and aesthetic appeal they’ll bring to your space. Start by identifying the primary purpose of the lighting in each area – whether it’s for ambient, task, or accent lighting.

    For example, pendant lights work well over dining tables for both functional illumination and visual interest. Chandeliers can add a touch of elegance to a living room or foyer. Wall sconces are great for providing accent lighting and creating a cozy atmosphere in bedrooms or hallways.

    Additionally, pay attention to the style of your fixtures. Modern fixtures with clean lines and metallic finishes can complement contemporary spaces, while ornate fixtures with intricate details are better suited for traditional interiors.

    Don’t forget to consider the size of the fixtures in relation to the room – large fixtures in a small room can overwhelm the space, while small fixtures in a large room may get lost. By carefully selecting fixtures that align with both your lighting needs and the overall design aesthetic, you can create a custom lighting scheme that enhances the beauty and functionality of your home.

    Layering Light Effectively

    To effectively layer light in your custom interior lighting design, consider the different types of lighting sources you can incorporate to create a dynamic and well-balanced ambiance. Start by using ambient lighting, such as ceiling-mounted fixtures or recessed lights, to provide overall illumination to the space.

    Then, add task lighting in areas where specific activities are performed, like under-cabinet lights in the kitchen or reading lamps by the sofa. To enhance the visual appeal and add depth to the room, incorporate accent lighting with track lights, wall sconces, or picture lights to highlight architectural features, artwork, or decorative elements.

    Mixing these various types of lighting won’t only brighten up the room but also add depth and character. Remember to layer the light at different heights and angles to avoid harsh shadows and create a warm and inviting atmosphere.

    Incorporating Smart Lighting Technology

    Enhance your custom interior lighting design by seamlessly integrating smart lighting technology into your space. Smart lighting allows you to control the ambiance, mood, and functionality of your room with ease. Start by installing smart bulbs that can be dimmed or change color temperature to suit different activities or times of day. These bulbs can be controlled remotely via a smartphone app or voice commands, giving you the flexibility to adjust lighting levels without getting up.

    Additionally, consider incorporating smart switches or sensors that automatically turn lights on or off based on motion detection or ambient light levels. This not only adds convenience but also helps save energy.

    Furthermore, explore the option of setting up lighting schedules to align with your daily routines or to enhance security when you’re away from home. Smart lighting technology offers endless possibilities for customization and creativity, allowing you to transform your space into a personalized and dynamic environment that suits your lifestyle.

    Automotive & Tools

    [product_category category=”automotive-tools” per_page=”10″ columns=”2″ orderby=”date” order=”rnde”]

  • How to Achieve a Professional Look With DIY Car Detailing

    How to Achieve a Professional Look With DIY Car Detailing

    To achieve a professional look with DIY car detailing, start by focusing on the basics: the right tools and products. From cleaning the exterior to restoring the interior, attention to detail is key. But what truly sets apart a professional finish? It’s all about the techniques and subtle touches that elevate your car’s appearance. So, as you embark on this journey to transform your vehicle, remember, the devil is in the details.

    Essential Tools and Supplies

    To achieve professional results in DIY car detailing, gather the essential tools and supplies you’ll need. Start with a high-quality car wash soap to ensure a thorough clean without damaging the paint. Pair this with a soft microfiber wash mitt to prevent scratches. A two-bucket wash system is crucial for preventing dirt from being reapplied to the paint surface. Additionally, a sturdy hose with an adjustable nozzle will help control water flow during the wash.

    Moving on to the interior, a vacuum cleaner with various attachments is essential for reaching tight spaces and removing dirt from carpets and upholstery. Microfiber cloths are versatile for cleaning surfaces without leaving lint or scratches. A gentle all-purpose cleaner can tackle stubborn stains on seats or carpets. Don’t forget to protect surfaces with a quality interior protectant to maintain a fresh look.

    Lastly, for the exterior, a clay bar kit can remove embedded contaminants before waxing. High-quality wax or sealant will provide protection and a glossy finish. Microfiber towels are ideal for buffing and applying products. By having these essential tools and supplies on hand, you can achieve professional-looking results in your DIY car detailing endeavors.

    Step-by-Step Exterior Detailing Guide

    Begin by preparing the exterior of your vehicle for detailing by thoroughly rinsing off any loose dirt and debris. Use a hose or pressure washer to remove the majority of the dirt before moving on to washing the car.

    Next, mix a car wash solution with water in a bucket according to the product instructions. Using a microfiber wash mitt, start at the top of the vehicle and work your way down, washing in straight lines to prevent swirl marks. Rinse the car thoroughly to remove all soap residue.

    After washing, inspect the paint for any contaminants like tar or bugs. Use a clay bar and lubricant to gently remove these imperfections. Once the paint is smooth, you can move on to polishing to restore shine and remove light scratches. Apply a small amount of polish to a polishing pad and work in small sections, buffing in circular motions.

    Interior Cleaning and Restoration Tips

    For a professional-looking finish, start by thoroughly vacuuming the interior of your car to remove any dirt and debris. Use a vacuum with various attachments to reach into crevices and under seats.

    Next, wipe down all surfaces with a microfiber cloth and a gentle all-purpose cleaner. Pay special attention to areas prone to dirt buildup, like cup holders and door handles. For stubborn stains on upholstery or carpets, consider using a specialized cleaner and a soft brush to gently scrub the affected areas.

    To restore the luster of your dashboard and trim, use a quality interior detailing spray. Apply the spray onto a microfiber cloth and wipe the surfaces in a circular motion. Avoid spraying directly onto electronic components to prevent damage. Don’t forget about cleaning the windows and mirrors; a glass cleaner and a clean cloth will leave them streak-free.

    Lastly, freshen up the interior by using an air freshener or odor eliminator. Choose a scent that suits your preferences and spray it lightly throughout the car. Proper interior cleaning and restoration won’t only enhance the overall look of your vehicle but also create a more enjoyable driving experience.

    Finishing Touches for a Professional Shine

    Enhance the overall appearance of your car with these final steps that will give it a professional shine. After washing and polishing your vehicle, there are a few key finishing touches you can add to elevate its look. Start by applying a high-quality wax to protect the paint and enhance its gloss. Waxing also helps repel water, dirt, and other contaminants, keeping your car looking pristine for longer.

    Next, focus on the windows and mirrors. Use a glass cleaner and a microfiber cloth to remove any streaks or residue, ensuring crystal-clear visibility from both the inside and outside. Don’t forget to clean the rims and tires to complete the overall polished look. A tire cleaner will help remove dirt and grime while also restoring a deep black finish to your tires.

    Lastly, pay attention to the small details like door jambs and trim pieces. Wipe down these areas with a detailing spray and a soft brush to remove dust and grime, giving your car a truly professional finish that will turn heads wherever you go.

    Automotive & Tools

    [product_category category=”automotive-tools” per_page=”10″ columns=”2″ orderby=”date” order=”rnde”]

  • What Are the Benefits of Regular Car Detailing?

    What Are the Benefits of Regular Car Detailing?

    Regular car detailing is more than just a cosmetic touch-up; it plays a crucial role in the overall maintenance of your vehicle. By regularly detailing your car, you not only preserve its pristine appearance but also safeguard it from various environmental elements that can cause long-term damage. The benefits extend far beyond aesthetics, impacting safety, comfort, and the longevity of your investment. So, why not explore how this simple practice can elevate your driving experience and protect your vehicle for the long haul?

    Preserves Resale Value

    To maintain the highest resale value for your vehicle, regular car detailing is essential. By consistently detailing your car, you not only keep it looking pristine but also protect its exterior and interior from wear and tear.

    Potential buyers are often willing to pay more for a well-maintained vehicle that looks like new. Regular detailing helps preserve the paint job, preventing it from fading or deteriorating due to exposure to the sun, dirt, and other environmental factors.

    When the time comes to sell your car, a detailed interior free of stains, odors, and damage can significantly increase its appeal to prospective buyers. Additionally, a well-maintained exterior, free of scratches and swirl marks, gives the impression that the car has been cared for and maintained properly.

    Ultimately, regular car detailing is a relatively small investment that can pay off in the long run by helping you secure a higher resale value for your vehicle.

    Protects From Environmental Damage

    How can regular car detailing protect your vehicle from environmental damage?

    Regular detailing helps shield your car’s exterior from harmful elements like UV rays, acid rain, bird droppings, and tree sap. These environmental factors can cause paint oxidation, fading, and corrosion if left unchecked.

    By applying a protective wax or sealant during detailing sessions, you create a barrier that acts as a shield against these threats. The wax or sealant forms a layer that repels water and contaminants, preventing them from adhering to your car’s surface and causing damage.

    Additionally, detailing includes cleaning the undercarriage and wheel wells, removing dirt, salt, and debris that can lead to rust and corrosion over time. By keeping these areas clean and protected, you can prolong the lifespan of your vehicle’s chassis and components.

    Ultimately, regular car detailing is a proactive measure to defend your car against environmental hazards and maintain its appearance and structural integrity for years to come.

    Enhances Driving Experience

    Regular car detailing elevates your driving experience by instilling a sense of pride and satisfaction in your vehicle’s appearance and performance. When your car looks and feels its best, you’ll find yourself enjoying every moment behind the wheel even more. The clean and polished exterior not only catches the eye of onlookers but also boosts your confidence as you cruise down the road. The fresh, spotless interior creates a pleasant environment, making your drives more comfortable and enjoyable.

    Moreover, regular detailing enhances your driving experience by improving safety. Clean windows, mirrors, and lights ensure maximum visibility, reducing the risk of accidents. A well-maintained vehicle also functions more efficiently, providing smoother rides and better handling. By investing in car detailing, you invest in a better driving experience overall.

    Extends Vehicle Lifespan

    Extending your vehicle’s lifespan through regular car detailing involves more than just maintaining its appearance; it’s about ensuring long-term performance and durability.

    By routinely detailing your car, you’re protecting it from various elements that can cause wear and tear over time. Detailing involves cleaning both the exterior and interior of your vehicle, which helps in preventing rust, corrosion, and deterioration of the paintwork. Removing contaminants like dirt, grime, and road salt through detailing can prevent them from causing long-term damage to your car’s body and components.

    Regular detailing also involves protecting your vehicle’s upholstery, dashboard, and other interior surfaces from fading, cracking, or aging prematurely. By conditioning and cleaning these areas, you can maintain their quality and prevent them from deteriorating. This not only enhances your driving experience but also ensures that your vehicle retains its value over time.

    Ultimately, investing in regular car detailing can significantly extend the lifespan of your vehicle and keep it looking and performing at its best for years to come.

    Automotive & Tools

    [product_category category=”automotive-tools” per_page=”10″ columns=”2″ orderby=”date” order=”rnde”]

  • What’s the Best Way to Remove Pet Hair From Car Seats?

    What’s the Best Way to Remove Pet Hair From Car Seats?

    When it comes to dealing with pet hair on your car seats, you want a method that is efficient and practical. There are various tools and techniques available that can make the task easier, but which one truly stands out as the best solution? From specialized brushes to innovative DIY hacks, finding the most effective way to remove pet hair from car seats may surprise you. So, what exactly is the ultimate method that will leave your car seats looking clean and fur-free?

    Tools You’ll Need

    Wondering what tools you’ll need to tackle pet hair removal from your car seats?

    The key to effectively removing pet hair is having the right tools at your disposal. Firstly, invest in a high-quality lint roller or pet hair remover brush. These tools are efficient at grabbing onto pet hair and pulling it away from the fabric of your car seats.

    Additionally, a pair of rubber gloves can work wonders. Simply dampen the gloves and run your hands over the seats to gather the hair into manageable clumps.

    Another essential tool is a handheld vacuum cleaner with a brush or rubber nozzle attachment. This will help you suction up the loosened pet hair quickly and easily.

    For stubborn hair that’s deeply embedded in the seats, a squeegee can be surprisingly effective. Just spray a mixture of water and fabric softener onto the seats, then use the squeegee to scrape off the hair.

    These tools, when used in combination, will make the task of removing pet hair from your car seats much more manageable.

    Effective Vacuuming Techniques

    To effectively remove pet hair from your car seats, master the art of vacuuming with these proven techniques. Start by using a vacuum with strong suction power and a brush attachment. Begin by vacuuming the seats in a back-and-forth motion, ensuring you reach all crevices where pet hair may be hiding. Use short strokes and overlap your passes to catch as much hair as possible.

    For stubborn pet hair that’s deeply embedded in the fabric, try lightly misting the seats with water or a fabric softener mixed with water. This can help loosen the hair, making it easier to vacuum up. Additionally, consider using a rubber squeegee or a rubber glove to gather hair into clumps for easier removal.

    Remember to empty the vacuum frequently to maintain its suction power. Repeat the vacuuming process until no more hair is being collected. By following these effective vacuuming techniques, you can say goodbye to pesky pet hair in your car seats.

    DIY Pet Hair Removal Solutions

    Consider utilizing common household items to tackle pet hair in your car seats effectively. One DIY solution is using a rubber glove or latex glove. Simply dampen the glove with water, then run your hand over the car seat surface. The pet hair will stick to the glove, making it easy to gather and dispose of.

    Another option is to use a squeegee – the rubber edge can help lift the pet hair from the seats. Just glide the squeegee across the upholstery to collect the hair into a clump for easy removal.

    Additionally, a balloon can be surprisingly effective. Rubbing a balloon over the seats creates static electricity, attracting the pet hair and making it easier to gather.

    If you don’t have a squeegee or balloon, try using duct tape or packing tape. Wrap it around your hand with the sticky side out and press it onto the seats to pick up the pet hair. These simple DIY solutions can make pet hair removal a breeze.

    Preventing Future Build-Up

    How can you maintain a pet hair-free car interior for longer periods?

    One effective way to prevent future build-up of pet hair in your car is by using protective covers. Invest in seat covers specifically designed to resist pet hair. These covers act as a barrier, making it easier to remove hair and keeping your car seats clean.

    Additionally, consider using a pet seat belt or carrier to limit your pet’s movement during car rides, reducing the spread of hair. Regularly grooming your pet can also help minimize shedding, resulting in less hair in your car. Another tip is to brush your pet before car trips to remove loose hair.

    Vacuuming your car frequently, using a pet-specific vacuum attachment, can help pick up any stray hairs before they become deeply embedded. Lastly, consider using anti-static spray on car seats to repel pet hair.

    Automotive & Tools

    [product_category category=”automotive-tools” per_page=”10″ columns=”2″ orderby=”date” order=”rnde”]

  • A Beginner’s Guide to Proper Car Washing Techniques

    A Beginner’s Guide to Proper Car Washing Techniques

    When it comes to washing your car, taking the time to do it correctly can make a significant difference in the overall look and condition of your vehicle. By understanding the proper techniques and using the right tools, you can ensure a thorough clean that protects your car’s paint and finish. Starting with the basics and gradually mastering the process will not only enhance your car’s appearance but also contribute to its longevity.

    Importance of Proper Car Washing

    Proper car washing ensures your vehicle maintains its shine and protects its paint from damage. Washing your car regularly helps to remove dirt, grime, and other contaminants that can accumulate on the surface. These contaminants, if left unchecked, can lead to scratches, swirl marks, and even corrosion on the paintwork.

    In addition to preserving the appearance of your vehicle, regular washing also helps to maintain its resale value. A clean and well-maintained car is more attractive to potential buyers and can fetch a higher price when it comes time to sell.

    Moreover, washing your car yourself allows you to inspect its condition up close. You can spot any chips, dings, or other imperfections that may require attention. This proactive approach can help you address minor issues before they escalate into costly repairs.

    Essential Tools and Supplies

    To effectively wash your car, you’ll need a set of essential tools and supplies that ensure a thorough cleaning process. The first item on your list should be a gentle car wash soap specifically formulated for automotive use. Avoid using household detergents as they can strip off wax and harm the paint.

    Additionally, invest in a quality microfiber wash mitt or sponge to prevent scratching the surface of your car while washing. A couple of buckets are essential – one for the soapy water and another for rinsing your mitt to keep dirt away from the clean water.

    To dry your car efficiently and prevent water spots, a microfiber drying towel is a must-have. You may also consider using a separate towel for drying wheels to avoid transferring brake dust to the body. A good quality wax or sealant will help protect your car’s paint and keep it looking shiny.

    Step-by-Step Car Washing Technique

    Start by rinsing your car thoroughly with clean water to remove loose dirt and debris before moving on to the washing process. Use a hose with a gentle spray or a pressure washer on low setting to ensure all the dirt is loosened and washed away.

    Next, prepare a bucket of soapy water using a dedicated car wash soap. Dip a clean wash mitt or microfiber cloth into the soapy water and start washing your car from the top down, working in sections to prevent soap from drying on the surface. Rinse the wash mitt frequently to avoid scratching the paint with dirt particles. Once the entire car is washed, rinse off all the soap thoroughly with clean water.

    After rinsing, dry the car using a soft microfiber towel or a drying cloth to prevent water spots. Start by blotting the water rather than rubbing to avoid swirl marks. Pay special attention to drying seams, crevices, and other hard-to-reach areas. Your car is now clean and ready for the next steps in car care.

    Tips for Maintaining a Clean Car

    Consider implementing a regular car washing schedule to keep your vehicle looking its best and protect its paint from dirt and contaminants. Washing your car once a week is ideal, but aim for at least every two weeks if you can’t manage weekly washes. Additionally, don’t overlook the importance of drying your car after washing to prevent water spots and streaks. Use a clean microfiber towel or chamois for best results.

    Regularly vacuuming the interior of your car helps maintain cleanliness and prevents dirt and debris from building up. Pay special attention to areas where crumbs and dirt tend to accumulate, like under the seats and in between crevices. Wipe down surfaces with a damp microfiber cloth to keep dust at bay.

    Lastly, consider applying a coat of wax every 3-4 months to protect your car’s paint and give it a shiny finish. This extra layer acts as a barrier against environmental contaminants and UV rays. By following these tips, you can ensure your car stays clean and in top condition for years to come.

    Automotive & Tools

    [product_category category=”automotive-tools” per_page=”10″ columns=”2″ orderby=”date” order=”rnde”]