Category: Kitchen & Cooking

  • How Do You Use Broiling to Achieve Crispy Textures?

    How Do You Use Broiling to Achieve Crispy Textures?

    When it comes to achieving crispy textures using broiling, there are a few key techniques that can make all the difference in your cooking. From the preparation of the food before placing it under the broiler to the monitoring process while it cooks, each step plays a crucial role in ensuring that perfect crunch. By understanding the nuances of broiling and implementing some expert tips, you can elevate your dishes to a whole new level of crispiness.

    Benefits of Broiling

    When broiling, you can enjoy the benefits of quick cooking and a deliciously crispy texture. Broiling is a fantastic cooking method that allows you to cook your food fast by exposing it directly to high heat. Unlike other methods that may require preheating or long cooking times, broiling heats up quickly and cooks your food in a matter of minutes. This makes it a great option for those busy weeknights when you want a tasty meal without spending hours in the kitchen.

    Additionally, broiling helps to achieve a crispy exterior on your food. The high heat from the broiler caramelizes the sugars on the surface of your food, creating a delightful crunch that locks in the juices and flavors. Whether you’re broiling vegetables, meats, or seafood, this method can elevate the texture of your dishes, adding a satisfying contrast between the crunchy exterior and the tender interior.

    Best Foods to Broil

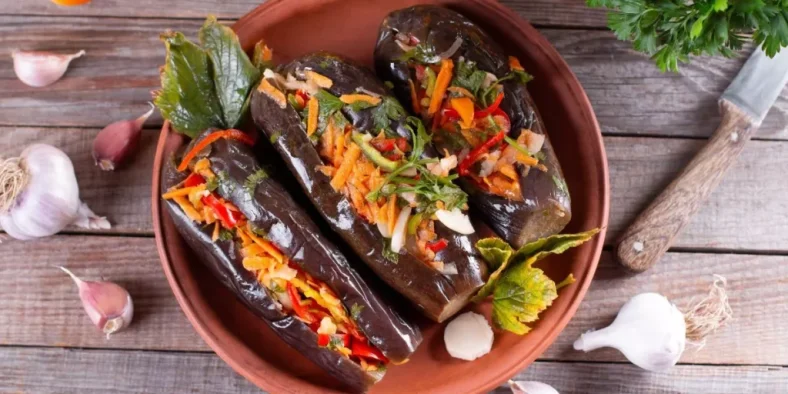
    For achieving optimal results when broiling, selecting the right foods is crucial. Certain foods are better suited for broiling due to their textures and flavors. Thin cuts of meat like chicken breasts, pork chops, or fish fillets are excellent choices as they cook quickly and develop a delicious charred exterior. Vegetables such as bell peppers, zucchini, asparagus, and tomatoes also broil well, bringing out their natural sweetness and creating a crispy exterior while maintaining a tender interior.

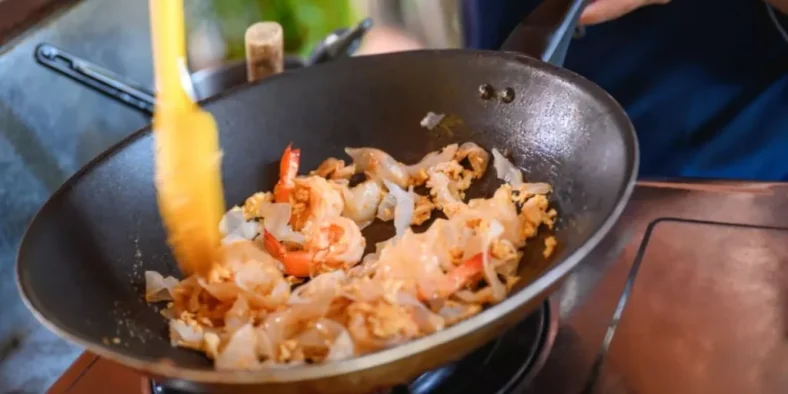
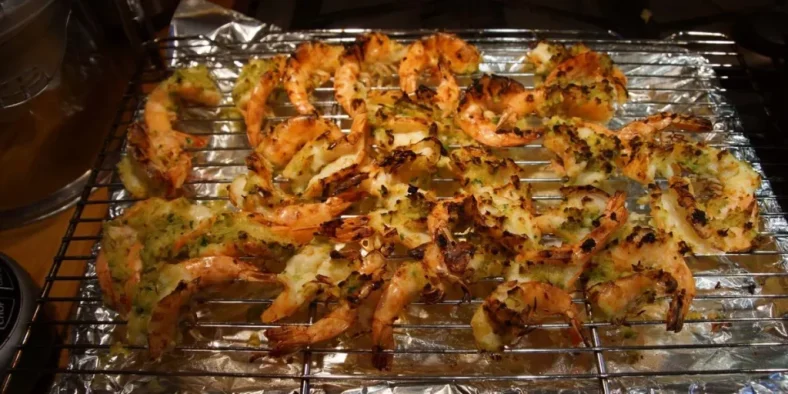
    When broiling, consider using foods that can withstand high heat without losing moisture, resulting in a juicy and flavorful outcome. Shrimp, scallops, and lobster tails are fantastic seafood options that cook rapidly under the broiler, staying succulent and acquiring a delightful smoky flavor. Additionally, fruits like peaches, pineapples, and mangoes can be broiled to caramelize their sugars and intensify their sweetness, making them perfect for desserts or accompaniments to savory dishes. Experimenting with different foods will help you discover your favorite broiled creations.

    Broiling Techniques to Master

    To achieve optimal results when broiling, mastering essential techniques is key to ensuring your dishes come out perfectly crispy and flavorful. One crucial technique to master is positioning the oven rack correctly. For broiling, the rack should typically be placed in the top position in your oven, allowing the food to be closer to the broiler element for even cooking and browning.

    Preheating the broiler is another essential step. Make sure to preheat the broiler for a few minutes before placing your food inside. This ensures that the food starts cooking immediately and helps in achieving that desired crispy texture.

    Additionally, using the right cookware can greatly impact the broiling process. Opt for broiler-safe pans and trays that can withstand high temperatures without warping. This ensures even cooking and browning of your food.

    Tips for Achieving Crispy Results

    Positioning your oven rack correctly and preheating the broiler are fundamental steps in achieving crispy results when broiling. Placing the rack in the top third of the oven ensures that your food is close enough to the broiler to crisp up quickly without burning. Preheating the broiler before cooking allows for immediate high heat, essential for creating that desirable crispy texture.

    Another tip for achieving crispy results is to pat your food dry before broiling. Excess moisture can prevent browning and crispiness, so use a paper towel to remove any surface moisture from your ingredients before placing them under the broiler.

    Additionally, consider using a light brushing of oil on your food before broiling. This thin layer of oil helps promote browning and crisping, enhancing the texture of your dish.

    Lastly, keep a close eye on your food while broiling. Crispy can quickly turn to burnt, so stay vigilant and use a timer to prevent overcooking. By following these tips, you’ll be on your way to achieving perfectly crispy results every time you broil.

    Kitchen Appliances

    [product_category category=”kitchen-appliances” per_page=”10″ columns=”2″ orderby=”date” order=”rnde”]

  • How Do You Achieve the Perfect Poached Egg?

    How Do You Achieve the Perfect Poached Egg?

    When aiming for the perfect poached egg, a crucial element is mastering the art of maintaining the right water temperature. This delicate balance is key to achieving that coveted runny yolk and beautifully set egg whites. But how do you ensure that the water remains at the ideal temperature throughout the poaching process? Let’s explore this essential step further to elevate your poached egg game.

    Selecting the Freshest Eggs

    When choosing eggs for poaching, always opt for the freshest ones available. Fresh eggs have firmer whites, which helps them hold their shape better when poaching. To determine the freshness of an egg, you can perform a simple test. Fill a bowl with water and gently place the egg inside. If the egg sinks and lies flat on its side, it’s very fresh. If it stands upright at the bottom, it’s still fresh but not as ideal for poaching. However, if the egg floats to the surface, it’s best to discard it as it’s no longer fresh.

    Another aspect to consider when selecting eggs is the size. For poaching, it’s recommended to use large or extra-large eggs. These sizes provide the right balance between the amount of egg white and yolk, resulting in a nicely proportioned poached egg. Remember, the freshness and size of the eggs you choose play a crucial role in achieving that perfect poached egg.

    Mastering the Poaching Technique

    To achieve a perfectly poached egg, mastering the poaching technique is essential. Start by bringing a pot of water to a gentle simmer. Add a splash of vinegar to help the egg whites coagulate faster.

    Crack a fresh egg into a small bowl or cup. Create a whirlpool in the simmering water by stirring it gently with a spoon. Once the whirlpool is formed, carefully slide the egg into the center. The swirling motion helps the egg whites wrap around the yolk neatly. Let the egg poach for about 3-4 minutes for a soft yolk or longer for a firmer yolk.

    Avoid overcrowding the pot; poach one egg at a time for the best results. Using a slotted spoon, carefully remove the poached egg from the water and place it on a paper towel to drain excess water. Trim any unruly edges if desired.

    Mastering the poaching technique takes practice, but with patience and attention to detail, you’ll soon be serving up beautifully poached eggs every time.

    Perfecting the Water Temperature

    Maintain a gentle simmer to achieve the perfect water temperature for poaching eggs effectively. The ideal water temperature for poaching eggs is around 160-180°F (71-82°C). At this temperature range, the water should be hot enough to cook the egg white quickly while keeping the yolk runny and creamy inside. To test if the water is at the right temperature, you can use a kitchen thermometer or look for small bubbles forming at the bottom of the pot without the water coming to a rolling boil.

    Avoid bringing the water to a vigorous boil, as this can create a whirlpool effect that could break up the delicate egg whites. Instead, aim for a gentle simmer where the water is just barely bubbling. Adjust the heat as needed to maintain this gentle simmer throughout the poaching process.

    Enhancing Flavor With Seasonings

    Consider infusing your poached eggs with a medley of herbs and spices to elevate their flavor profile. Adding seasonings can transform a simple poached egg into a culinary delight. Start by sprinkling a pinch of salt and pepper over the egg as soon as it comes out of the water. This basic seasoning enhances the natural flavors.

    For a more adventurous twist, try incorporating herbs like chives, dill, or parsley. These fresh herbs not only add a pop of color but also bring a burst of freshness to each bite. You can also experiment with spices such as paprika, cayenne pepper, or smoked paprika to introduce a hint of heat or smokiness to your poached eggs.

    Don’t forget about seasoning blends like za’atar, Italian seasoning, or curry powder for a more complex flavor profile. These blends offer a unique combination of herbs and spices that can take your poached eggs to the next level. Remember, a little seasoning can go a long way in enhancing the overall taste of your perfectly poached eggs.

    Kitchen Appliances

    [product_category category=”kitchen-appliances” per_page=”10″ columns=”2″ orderby=”date” order=”rnde”]

  • What Are the Best Eco-Friendly Cleaning Products for Kitchens?

    What Are the Best Eco-Friendly Cleaning Products for Kitchens?

    When it comes to keeping your kitchen spick and span, opting for eco-friendly cleaning products is not just a trend but a conscious choice for a healthier home and planet. But with the array of options out there, how do you know which ones are truly the best for your kitchen? Well, let’s break it down to find out which eco-friendly cleaning products stand out in terms of effectiveness and sustainability, making your kitchen shine without harming the environment.

    Natural All-Purpose Cleaners

    When looking for effective and eco-friendly cleaning solutions, natural all-purpose cleaners are your best bet. These cleaners are versatile and can tackle a wide range of kitchen messes without harsh chemicals. They’re typically made from plant-based ingredients like vinegar, baking soda, or essential oils, which are safer for both your health and the environment.

    To use natural all-purpose cleaners effectively, simply spray the solution on the surface you wish to clean and wipe it away with a cloth or sponge. You’ll be amazed at how well these cleaners can cut through grease, grime, and stains, leaving your kitchen sparkling clean and smelling fresh.

    Not only are natural all-purpose cleaners gentle on the planet, but they also come in recyclable or biodegradable packaging, reducing waste. By choosing these eco-friendly options, you’re making a positive impact on both your home and the environment. Next time you reach for a cleaning product, consider opting for a natural all-purpose cleaner for a greener kitchen cleaning routine.

    Eco-Friendly Dish Soaps

    For a complete eco-friendly kitchen cleaning arsenal, consider incorporating eco-friendly dish soaps into your routine. When choosing an eco-friendly dish soap, look for products that are plant-based, biodegradable, and free from harmful chemicals like phosphates and parabens. These dish soaps aren’t only gentle on the environment but also on your skin.

    Opt for dish soaps that come in recyclable packaging to further reduce your carbon footprint. Many eco-friendly dish soaps also come in concentrated forms, allowing you to use less product per wash and reducing the amount of packaging waste generated.

    When using eco-friendly dish soaps, you can rest assured that harmful chemicals aren’t being washed down the drain and into water systems, where they can negatively impact aquatic life. Additionally, these products often come in various natural scents like citrus or lavender, providing a pleasant washing experience without artificial fragrances.

    Make the switch to eco-friendly dish soaps today to contribute to a cleaner, greener planet while keeping your dishes sparkling clean.

    Biodegradable Cleaning Wipes

    Consider incorporating biodegradable cleaning wipes into your eco-friendly kitchen cleaning routine for a convenient and sustainable way to keep your surfaces clean. Biodegradable cleaning wipes are made from materials that break down naturally, reducing harm to the environment.

    These wipes are ideal for wiping down countertops, appliances, and other kitchen surfaces without leaving behind harmful residues. They’re a great alternative to traditional cleaning wipes, which often contain chemicals that can be damaging to both your health and the environment.

    When choosing biodegradable cleaning wipes, look for products that are free from harsh chemicals, fragrances, and dyes. Opt for wipes that are compostable and come in recyclable packaging to further minimize your environmental impact.

    Using biodegradable cleaning wipes not only helps you maintain a clean kitchen but also contributes to a healthier planet. Make the switch to biodegradable cleaning wipes today and enjoy a sparkling clean kitchen without compromising on sustainability.

    Plant-Based Degreasers

    To enhance your eco-friendly kitchen cleaning routine, explore the effectiveness of plant-based degreasers for tackling tough grease and grime on various surfaces. Plant-based degreasers are powerful cleaners derived from natural ingredients like citrus fruits, vinegar, and plant oils. These eco-friendly alternatives effectively break down grease without harsh chemicals, making them safe for you and the environment.

    When choosing a plant-based degreaser, look for products that are biodegradable and free from toxic substances. These cleaners are gentle on your skin and respiratory system while still being tough on kitchen grease. You can use plant-based degreasers on stovetops, countertops, range hoods, and other kitchen surfaces to remove built-up grease and grime without leaving behind harmful residues.

    Additionally, plant-based degreasers often come in recyclable packaging, further reducing their environmental impact. By incorporating these eco-friendly cleaners into your kitchen cleaning routine, you can effectively combat grease and grime while minimizing your carbon footprint.

    Environmentally Safe Kitchen Scrubbers

    Explore how environmentally safe kitchen scrubbers can effectively remove tough stains and residue from kitchen surfaces without harming the environment. When selecting a kitchen scrubber, opt for options made from natural and biodegradable materials like bamboo, loofah, or coconut coir. These materials provide the abrasiveness needed to tackle grime while being gentle on surfaces. Look for scrubbers that are free from synthetic fibers and chemicals to ensure a truly eco-friendly cleaning experience.

    Not only are environmentally safe kitchen scrubbers effective at cleaning, but they also help reduce plastic waste. Many conventional scrubbers are made from plastic that ends up in landfills and oceans, contributing to pollution. By choosing sustainable alternatives, you can minimize your environmental impact while keeping your kitchen sparkling clean.

    Remember to properly maintain your eco-friendly scrubbers by rinsing them thoroughly after each use and allowing them to air dry. This practice prolongs their lifespan, making them a more sustainable choice in the long run. Make the switch to environmentally safe kitchen scrubbers today and enjoy a greener way of keeping your kitchen spotless.

    Kitchen Appliances

    [product_category category=”kitchen-appliances” per_page=”10″ columns=”2″ orderby=”date” order=”rnde”]

  • How Can You Save Time and Money Through Effective Weekly Meal Prep?

    How Can You Save Time and Money Through Effective Weekly Meal Prep?

    When it comes to optimizing your time and budget, effective weekly meal prep can be a game-changer. Imagine having delicious, home-cooked meals ready to go whenever hunger strikes, without the hassle of last-minute grocery store runs or expensive takeout orders. By implementing smart strategies and simple techniques, you can transform your relationship with food and kitchen routines. So, why not explore how a little upfront planning can pave the way for smoother, more economical meal times?

    Benefits of Weekly Meal Prep

    By planning and preparing your meals ahead of time each week, you can experience numerous benefits that will save you both time and money. One significant advantage is the ability to control your portions and ingredients, leading to healthier meals. With meal prep, you can ensure that your meals are balanced and nutritious, helping you avoid the temptation of unhealthy fast food or expensive restaurant meals.

    Another benefit of weekly meal prep is the reduction of food waste. By planning your meals in advance and buying only what you need, you can minimize the amount of food that goes unused and ends up being thrown away. This not only saves you money but also helps in reducing your environmental impact.

    Additionally, weekly meal prep can help you save time during the week. By dedicating a few hours on the weekend to prepare your meals, you can avoid the stress of having to cook every day after a long day at work. This time-saving aspect allows you to enjoy more free time during the week for yourself or with your loved ones.

    Time-Saving Meal Prep Tips

    To streamline your meal preparation process and save time in the kitchen, consider implementing these effective time-saving meal prep tips. Begin by planning your meals for the week ahead. This simple step can help you create a grocery list, avoid last-minute trips to the store, and reduce waste.

    Another time-saving tip is to batch cook ingredients like grains, proteins, and vegetables. Cook a large portion that can be used in multiple meals throughout the week, cutting down on cooking time each day.

    Utilizing kitchen tools like a slow cooker or instant pot can also save you time by allowing you to cook meals with minimal effort. Prepping ingredients in advance, such as chopping vegetables or marinating meats, can significantly reduce the time it takes to assemble a meal during the week.

    Additionally, consider investing in quality food storage containers to keep your prepped ingredients fresh for longer, eliminating the need for daily prep work. By incorporating these time-saving tips into your weekly meal prep routine, you can make the most of your time in the kitchen while enjoying delicious and convenient meals.

    Cost-Effective Meal Planning Strategies

    Consider implementing cost-effective meal planning strategies to help you save money while still enjoying delicious and nutritious meals throughout the week.

    One effective strategy is to plan your meals around ingredients that are in season. Seasonal produce tends to be more affordable and fresher, which can enhance the flavor of your dishes.

    Buying in bulk is another smart approach to cut costs. Purchasing items like grains, beans, and spices in larger quantities often comes with a lower price per unit, saving you money in the long run.

    Additionally, utilizing leftovers creatively can help stretch your budget. For example, turning last night’s roasted vegetables into a flavorful soup or adding leftover chicken to a salad can create new meals without extra expenses.

    Lastly, consider incorporating more plant-based meals into your weekly plan. Legumes, grains, and vegetables are generally more affordable than meat, making vegetarian dishes a wallet-friendly option that can still be satisfying and nutritious.

    Maximizing Efficiency in the Kitchen

    Enhancing your kitchen efficiency can significantly streamline your meal prep routine and save you valuable time. Start by organizing your kitchen tools and ingredients in a functional layout. Keep frequently used items within easy reach to avoid wasting time searching for them. Utilize time-saving appliances like food processors or slow cookers to expedite meal preparation.

    Another way to maximize efficiency is by planning your meals in advance. Create a weekly meal plan, including recipes that share common ingredients to reduce waste and save time on grocery shopping. Prepping ingredients in bulk, such as chopping vegetables or marinating proteins, can also speed up the cooking process during the week.

    Clean as you go to prevent clutter and make it easier to move seamlessly between tasks. Invest in quality storage containers to store prepped ingredients or leftovers efficiently. Labeling containers with dates and contents can help you locate items quickly and reduce food waste. By implementing these strategies, you can make your kitchen a more efficient space for weekly meal prep, ultimately saving you time and effort.

    Kitchen Appliances

    [product_category category=”kitchen-appliances” per_page=”10″ columns=”2″ orderby=”date” order=”rnde”]

  • Can You Meal Prep Without Using Refrigerators and Still Keep Meals Fresh?

    Can You Meal Prep Without Using Refrigerators and Still Keep Meals Fresh?

    When it comes to meal prepping without refrigerators, the challenge lies in finding ways to maintain freshness without the usual cold storage. But fear not, as there are strategies and methods that can help you overcome this obstacle. By exploring innovative techniques and being mindful of certain principles, you may discover a whole new world of meal prep possibilities that don’t rely on traditional refrigeration. Stay tuned to uncover the secrets of keeping your prepped meals fresh and delicious without the need for a fridge.

    Challenges of Refrigerator-Free Meal Prep

    If you’re meal prepping without a refrigerator, you’ll face unique challenges that require creative solutions. One major hurdle is keeping perishable ingredients fresh without the luxury of a cooling appliance. To tackle this, consider opting for ingredients with longer shelf lives, such as grains, canned goods, and root vegetables. These items can withstand room temperature storage for longer periods.

    Another obstacle is maintaining the freshness of prepped meals throughout the week. Without a refrigerator, it’s crucial to focus on proper food handling techniques. Ensure that cooked dishes are promptly cooled to room temperature before sealing them in airtight containers. Additionally, divide meals into individual portions to minimize the risk of contamination when reheating.

    Transporting meals can also be tricky without the cooling capacity of a fridge. To address this, invest in insulated containers or lunchboxes with ice packs. These will help keep your meals at a safe temperature while on the go. By thinking ahead and implementing strategic solutions, you can successfully navigate the challenges of meal prepping without a refrigerator.

    Best Practices for Fresh Meal Prep

    To ensure optimal freshness in your meal prep, prioritize proper storage techniques and ingredient selection. Start by choosing fresh, high-quality ingredients. Opt for sturdy vegetables like carrots, bell peppers, and cabbage that can withstand room temperature storage. Select whole grains such as quinoa and brown rice that have a longer shelf life compared to refined grains. When it comes to proteins, consider canned tuna, beans, or dried lentils that don’t require refrigeration.

    For storage, use airtight containers to keep your meals fresh. Mason jars are great for salads, overnight oats, or layered meals. Invest in insulated lunch bags or coolers with ice packs if you need to transport your meals. Keep perishable items like dairy, meat, and cooked grains in a cool, dark place away from direct sunlight. Rotate your ingredients regularly to ensure you use the oldest items first.

    Alternative Food Storage Solutions

    Consider utilizing vacuum-sealed bags as an alternative food storage solution to maintain freshness without refrigeration. Vacuum-sealed bags help in preserving food by removing air, which slows down the growth of bacteria and prevents spoilage. These bags are airtight and can effectively keep oxygen out, extending the shelf life of your meals. Additionally, vacuum-sealed bags are convenient for portioning out your meals and keeping them organized.

    Another alternative food storage solution is using airtight containers. These containers create a barrier against moisture and air, helping to prevent food from spoiling quickly. Airtight containers come in various sizes and shapes, making them versatile for storing different types of meals. They’re reusable and easy to clean, making them a sustainable option for food storage.

    If vacuum-sealed bags and airtight containers aren’t available, consider using dry storage methods such as storing food in a cool, dark place away from sunlight. Pantries or cabinets can provide suitable conditions for storing non-perishable items like canned goods, dried fruits, nuts, and grains. These storage solutions can help maintain the freshness of your meals without the need for refrigeration.

    Tips for Maintaining Meal Freshness

    For optimal meal freshness without refrigeration, prioritize proper food rotation to ensure you consume the oldest items first. This practice helps prevent food spoilage and ensures that you utilize your meals before they lose freshness.

    When storing meals, make sure to seal them in airtight containers to maintain their quality. Avoid leaving prepared meals at room temperature for extended periods; instead, store them in a cool, dark place to slow down the growth of bacteria.

    Additionally, consider utilizing ingredients that have a longer shelf life, such as dried beans, rice, or canned goods. These items can withstand storage without refrigeration for longer periods.

    When preparing meals, incorporate ingredients that naturally have preservative properties, like vinegar, citrus juices, or certain herbs and spices. These natural preservatives can help extend the freshness of your meals.

    Kitchen Appliances

    [product_category category=”kitchen-appliances” per_page=”10″ columns=”2″ orderby=”date” order=”rnde”]

  • What Are Some Creative Ideas for Prepping Nutritious Meals Without Getting Bored?

    What Are Some Creative Ideas for Prepping Nutritious Meals Without Getting Bored?

    When it comes to preparing nutritious meals without falling into the rut of monotony, it’s essential to think outside the box. Have you considered incorporating unexpected ingredients or exploring new flavor combinations to elevate your dishes? By infusing creativity into your meal prep routine, you can transform the mundane into a culinary adventure that keeps your taste buds intrigued and your health goals on track. Discover how innovative techniques and bold pairings can revolutionize your approach to cooking, making each meal a delightful experience worth savoring.

    Meal Prep With a Twist

    Get ready to elevate your meal prep game with some innovative twists that will make your meals not only delicious but also exciting to prepare.

    One way to add a twist to your meal prep routine is by incorporating themed meal days. For example, designate Mondays as Mexican nights, Wednesdays as Mediterranean delights, and Fridays as Asian fusion feasts. This not only adds variety but also makes planning and prepping more fun.

    Another creative idea is to experiment with different cooking methods. Instead of always baking or grilling your proteins, why not try sous vide for a change? Sous vide cooking involves sealing your ingredients in a bag and cooking them in a water bath at a precise temperature. This method locks in flavors and nutrients, resulting in tender and juicy meats.

    Furthermore, consider playing around with textures and flavors. Mix crunchy elements like nuts or seeds with creamy components like avocado or yogurt to create a satisfying contrast in your meals. By incorporating these innovative twists, you’ll not only enjoy your meals more but also look forward to the prep process.

    Fusion Flavors for Variety

    To infuse your meal prep routine with an exciting twist, consider blending fusion flavors to bring a new level of variety to your dishes. Fusion flavors involve combining ingredients and cooking techniques from different cultures to create unique and delicious meals.

    For example, you could mix Mexican and Asian flavors by marinating chicken in a blend of soy sauce, lime juice, garlic, and cilantro. Or try a fusion of Italian and Middle Eastern cuisines by incorporating hummus into your pasta dishes for a creamy and flavorful twist.

    Experiment with spices like curry powder, sriracha, or za’atar to add depth and complexity to your dishes. Incorporating fusion flavors not only keeps your meals interesting but also introduces you to new taste sensations.

    You can customize your fusion creations based on your preferences, dietary restrictions, or simply what you have on hand in your kitchen. Don’t be afraid to get creative and mix unexpected ingredients to discover exciting new flavor combinations that will keep your taste buds delighted during mealtime.

    DIY Salad Bar Experience

    Embrace a fun and interactive approach to meal prep with your very own DIY Salad Bar Experience. Transform your kitchen into a vibrant salad bar by setting out a variety of fresh ingredients in colorful bowls. Start with a base of mixed greens, spinach, or kale, and then add a selection of colorful veggies like cherry tomatoes, cucumbers, bell peppers, and shredded carrots. Boost the protein content with options such as grilled chicken strips, chickpeas, or boiled eggs. Include some texture and flavor with toppings like crunchy croutons, nuts, seeds, and crumbled feta or goat cheese. Don’t forget to offer a range of dressings, from classic vinaigrettes to creamy avocado or tahini-based options.

    Encourage creativity by letting each family member build their own custom salad creation. This DIY Salad Bar Experience not only makes meal prep exciting but also ensures that everyone gets exactly what they want in their bowl. Plus, it’s a great way to incorporate a rainbow of nutrients into your diet effortlessly.

    Batch Cooking for Convenience

    Consider streamlining your meal preparation process by incorporating batch cooking for added convenience. Batch cooking involves preparing larger quantities of food at once, which can save you time and effort throughout the week. To start, choose a day when you have some extra time to devote to cooking, such as a weekend or a free evening. Plan your meals for the upcoming week and select recipes that are suitable for batch cooking, like stews, soups, casseroles, or roasted vegetables.

    Prepare all your ingredients in bulk, chop vegetables, marinate proteins, and portion out grains or legumes. Cook everything in larger batches than usual and store them in individual meal-sized containers. This way, you can simply grab a pre-prepped meal from the fridge or freezer when you’re ready to eat, heat it up, and enjoy a nutritious homemade dish without the hassle of cooking from scratch every day.

    Batch cooking not only saves time but also encourages healthier eating habits since you’ll have ready-made nutritious meals on hand, reducing the temptation to opt for less healthy convenience foods.

    Kitchen Appliances

    [product_category category=”kitchen-appliances” per_page=”10″ columns=”2″ orderby=”date” order=”rnde”]

  • Safe Handling Practices for Food Preparation

    Safe Handling Practices for Food Preparation

    When preparing food, your attention to safe handling practices can make a significant difference in the well-being of those you feed. By understanding the importance of proper food safety measures, you are taking crucial steps to safeguard against potential risks. From meticulous handwashing to strategic storage techniques, each action you take plays a vital role in maintaining a hygienic environment. Stay tuned to discover more insightful tips that can elevate your food preparation skills and ensure the safety of your loved ones.

    Importance of Food Safety

    Understanding the importance of food safety is crucial for preventing foodborne illnesses. By following proper food handling practices, you can significantly reduce the risk of contamination and keep yourself and others safe. One of the key reasons why food safety is essential is to prevent the spread of harmful bacteria, viruses, and parasites that can cause illnesses such as food poisoning. Ensuring that food is stored, prepared, and cooked correctly helps to kill any pathogens present and minimize the chances of getting sick.

    Maintaining food safety also plays a vital role in protecting vulnerable populations, such as children, elderly individuals, pregnant women, and people with weakened immune systems. These groups are more susceptible to foodborne illnesses and can experience severe complications if exposed to contaminated food. By practicing safe food handling techniques, you aren’t only safeguarding your health but also looking out for the well-being of those around you. Remember, food safety is everyone’s responsibility, and taking the necessary precautions can make a significant difference in preventing foodborne diseases.

    Handwashing Techniques

    Proper handwashing techniques are essential for maintaining food safety and preventing the spread of harmful bacteria and viruses. To effectively wash your hands, follow these steps:

    • First, wet your hands with clean, running water.
    • Then, apply soap and lather both sides of your hands, in between your fingers, and under your nails.
    • Scrub your hands for at least 20 seconds, focusing on areas where bacteria tend to accumulate.
    • Rinse your hands well under running water.
    • Finally, dry your hands with a clean towel or air dryer.

    It’s crucial to wash your hands at key times, such as before preparing food, after handling raw meat, poultry, or eggs, after using the restroom, after coughing or sneezing, and after touching garbage. By consistently practicing proper handwashing techniques, you can help prevent foodborne illnesses and protect yourself and others from getting sick. Remember, clean hands are the foundation of safe food handling practices.

    Proper Food Storage

    Wondering how to ensure your food stays safe and fresh? Proper food storage is crucial in maintaining the quality and safety of your ingredients. To start, always check the expiration dates on perishable items and use the ‘first in, first out’ rule to rotate older items to the front for quicker use.

    When storing raw meats, seafood, and poultry, it’s essential to keep them separate from ready-to-eat foods to prevent cross-contamination. Store these items in the coldest part of your refrigerator to maintain freshness and reduce the risk of bacteria growth. Additionally, make sure to place raw meats in sealed containers or on trays to catch any potential drips that could spread harmful bacteria.

    For fruits and vegetables, store them in the crisper drawer of your refrigerator or in a cool, dark pantry. Some produce items, like tomatoes and bananas, are better kept at room temperature to maintain flavor and texture. Remember to wash fruits and vegetables before consumption to remove any dirt or bacteria.

    Preventing Cross-Contamination

    To maintain food safety, always keep raw meats, seafood, and poultry separate from ready-to-eat foods to prevent cross-contamination. Cross-contamination can occur when harmful bacteria from raw foods are transferred to ready-to-eat foods, leading to foodborne illnesses.

    Use separate cutting boards and utensils for raw meats and ready-to-eat foods. Wash your hands thoroughly with soap and water after handling raw foods to avoid spreading bacteria.

    When storing foods in the refrigerator, keep raw meats in containers or sealed bags on the bottom shelf to prevent their juices from dripping onto other items. Use different plates for holding raw meats before cooking and serving cooked meats to avoid contamination.

    Be cautious with marinades that have come into contact with raw meats; either discard them or boil them before using them as a sauce. By taking these simple precautions, you can significantly reduce the risk of cross-contamination and ensure the safety of your meals.

    Kitchen Appliances

    [product_category category=”kitchen-appliances” per_page=”10″ columns=”2″ orderby=”date” order=”rnde”]

  • How Do You Use Marinating to Elevate Your Dishes?

    How Do You Use Marinating to Elevate Your Dishes?

    As you explore the world of marinating, you’ll discover the transformative power it holds for your culinary creations. The secret lies in the art of balancing flavors and textures, where each ingredient plays a vital role in enhancing the final dish. By mastering the skill of marinating, you unlock a realm of possibilities to take your cooking to new heights.

    Benefits of Marinating

    Marinating not only enhances the flavor of your dishes but also helps tenderize the meat, making it juicier and more flavorful. By allowing the marinade to seep into the meat, you infuse it with a variety of delicious flavors, transforming even the simplest cuts into mouthwatering delights. The acidic components in the marinade, such as vinegar or citrus juice, break down the tough muscle fibers in the meat, resulting in a more tender and succulent texture.

    Additionally, marinating can help reduce the formation of potentially harmful compounds when grilling meat at high temperatures. The marinade creates a barrier on the surface of the meat, acting as a shield against these compounds and promoting safer cooking practices. Moreover, marinating offers a creative outlet for experimenting with different flavor combinations, herbs, and spices, allowing you to customize your dishes to suit your preferences.

    Essential Marinating Ingredients

    In elevating your dishes with marinating, choosing the right essential ingredients is crucial for achieving optimal flavor and tenderness. The foundation of a great marinade often includes an acid component such as vinegar, citrus juice, or yogurt, which helps tenderize the meat by breaking down its fibers.

    To balance the acidity, you can add a sweet element like honey, sugar, or maple syrup. For depth of flavor, incorporate salt to enhance the overall taste and encourage moisture retention in the meat.

    Aromatic ingredients like garlic, onions, herbs, and spices bring complexity and richness to the marinade. Additionally, oils such as olive oil or sesame oil can help carry flavors and ensure the meat stays juicy during cooking.

    Experiment with different combinations of these essential marinating ingredients to create a marinade that suits your palate and enhances the natural flavors of your dish.

    Marinating Techniques and Tips

    To enhance the flavor and texture of your dishes, mastering effective marinating techniques is essential. Start by ensuring that your marinade covers the entire surface of the food item. This helps distribute the flavors evenly and ensures that every bite is delicious.

    Additionally, consider marinating your ingredients in a resealable plastic bag rather than a bowl. This method requires less marinade and allows for better contact between the marinade and the food. Remember to refrigerate your marinating food, as this prevents harmful bacteria growth and ensures food safety.

    Timing is crucial when marinating. While it’s tempting to marinate for longer periods, too much time can actually break down the proteins in the food and result in a mushy texture. Follow the recommended marinating times for each type of protein to achieve the best results.

    Marinating Recipes to Try

    Enhance your culinary skills by exploring these tantalizing marinating recipes that will elevate your dishes to new heights. Dive into a tangy world with a classic Lemon Herb Marinade. Mix olive oil, lemon juice, garlic, and a blend of fresh herbs like rosemary and thyme. Let your chicken or fish soak in this zesty concoction for a few hours before grilling for a burst of flavor.

    For a taste of the exotic, try a Spicy Asian-inspired marinade. Combine soy sauce, ginger, garlic, and a kick of sriracha for a bold and fiery twist. This marinade works wonders with beef or tofu, infusing them with a savory umami punch.

    Feeling adventurous? Experiment with a Chipotle Lime Marinade for a smoky and citrusy flavor explosion. Blend chipotle peppers in adobo sauce, lime juice, and a hint of honey for a perfect balance of heat and sweetness. Let your pork or shrimp marinate in this mixture for a thrilling culinary experience that will leave your taste buds dancing.

    Kitchen Appliances

    [product_category category=”kitchen-appliances” per_page=”10″ columns=”2″ orderby=”date” order=”rnde”]

  • Stir-Frying Like a Master Chef: Tips and Tricks

    Stir-Frying Like a Master Chef: Tips and Tricks

    When it comes to stir-frying like a master chef, the devil is in the details. From the sizzle of the pan to the final garnish, each step plays a crucial role in elevating your dish to the next level. But what truly sets a master stir-fry chef apart is the ability to balance flavors with precision. Imagine the aroma of soy sauce harmonizing with the sweetness of honey, the tang of vinegar, and the perfume of fresh ginger and garlic. Are you ready to unlock the secrets behind mastering this culinary art form?

    Essential Stir-Fry Equipment

    To master stir-frying, you’ll need a wok, a flat-bottomed one if you have an electric stove, and a high-heat friendly spatula. The wok’s shape allows for even heat distribution, essential for quick cooking. A flat-bottomed wok ensures maximum contact with the heat source, making it ideal for electric stoves. When choosing a wok, opt for carbon steel or cast iron for their durability and heat retention properties.

    Apart from the wok, a high-heat friendly spatula is crucial for stir-frying success. Look for spatulas made from materials like bamboo or heat-resistant silicone to prevent melting or warping at high temperatures. These spatulas are designed to withstand the intense heat of stir-frying without damaging your cookware.

    Investing in quality stir-fry equipment won’t only enhance your cooking experience but also elevate the flavors of your dishes. Make sure to season your wok properly before use and take good care of your high-heat spatula to prolong their lifespan and maintain their performance.

    Secrets to Flavorful Marinades

    For enhancing the taste of your stir-fry dishes, flavorful marinades hold the key to unlocking a world of vibrant flavors. When preparing your marinade, start with a base of soy sauce for a savory umami undertone. Add a hint of sweetness with honey or brown sugar, balanced by a splash of acidity from rice vinegar or citrus juice. Enhance the depth of flavor with minced garlic, grated ginger, and a touch of sesame oil for a nutty aroma.

    To ensure your ingredients absorb the marinade effectively, allow them to sit in the mixture for at least 30 minutes before stir-frying. For meats, marinating overnight can tenderize tougher cuts and infuse them with rich flavors. Remember not to overcrowd your protein in the marinade, as it may dilute the flavors and hinder proper absorption.

    Experiment with different herbs and spices to customize your marinades to suit your taste preferences. Whether you prefer a spicy kick from chili flakes or a fragrant note from fresh herbs like cilantro or mint, the key is to balance the flavors harmoniously to elevate your stir-fry dishes to new heights.

    Mastering Stir-Fry Cooking Techniques

    Explore the art of mastering stir-fry cooking techniques to elevate your culinary skills and create delicious dishes bursting with flavors. Start by ensuring your wok or pan is hot before adding oil and ingredients to achieve that signature stir-fry sear. Keep your ingredients cut uniformly for even cooking and a visually appealing dish. Stir-fry in small batches to prevent overcrowding and promote quick, high-heat cooking.

    Practice the toss-and-cook method by continuously moving the ingredients around the pan to cook them evenly and prevent burning. Use a spatula or tongs to flip and stir the ingredients effortlessly. Incorporate sauces and seasonings gradually to layer flavors without overwhelming the dish. Experiment with different cooking oils like sesame or peanut for unique tastes.

    Master the timing by adding ingredients that require longer cooking times first, followed by quicker-cooking ones. Finish by tasting and adjusting seasonings before serving. With these techniques, you’ll be on your way to mastering the art of stir-frying and creating impressive dishes with ease.

    Tips for Perfect Stir-Fry Presentation

    Wondering how to elevate your stir-fry dishes with impeccable presentation that will impress both visually and gastronomically? Follow these tips to take your stir-fry game to the next level. Start by choosing a variety of colorful vegetables to create a vibrant and appealing dish. Different textures and colors not only make your stir-fry visually appealing but also add a variety of flavors to each bite.

    Consider the size and shape of your ingredients to ensure even cooking and a harmonious presentation. Cutting vegetables and proteins into similar sizes and shapes helps them cook uniformly and creates a more aesthetically pleasing dish. Additionally, arranging your stir-fry on a clean and attractive serving platter can make a significant difference in how it’s perceived.

    Garnish your stir-fry with fresh herbs, toasted nuts, or sesame seeds for an extra pop of flavor and visual appeal. These simple additions can elevate the overall presentation of your dish and make it look even more appetizing. By paying attention to these details, you can create stir-fry dishes that not only taste delicious but also look stunning on the plate.

    Kitchen Appliances

    [product_category category=”kitchen-appliances” per_page=”10″ columns=”2″ orderby=”date” order=”rnde”]

  • Making Injera and Spiced Stews at Home

    Making Injera and Spiced Stews at Home

    To start your culinary journey into Ethiopian cuisine, mastering the art of making injera and spiced stews at home is a rewarding endeavor. The process of creating the spongy injera and richly flavored stews may seem daunting, but the end result is well worth the effort. From the tangy fermentation of teff flour to the intricate blend of spices in the stews, each step holds a key to unlocking the vibrant flavors of Ethiopia. By exploring the intricacies of these traditional dishes, you’ll not only tantalize your taste buds but also gain a deeper appreciation for the cultural significance of Ethiopian culinary traditions.

    Injera: The Heart of Ethiopian Cuisine

    When making injera, the traditional Ethiopian flatbread, it’s essential to start with a fermented batter to achieve its distinctive tangy flavor. Begin by mixing teff flour with water and allowing it to ferment for a few days. This fermentation process is crucial as it not only imparts flavor but also creates the characteristic spongy texture of the injera.

    After the batter has fermented, heat a non-stick pan or a special clay plate called a mitad over medium heat. Ladle a portion of the batter onto the pan, swirling it around to spread thinly and evenly. Cover the pan and let the injera cook until holes form on the surface and the edges lift easily.

    Once cooked, remove the injera and repeat the process with the remaining batter. Injera serves as both a plate and utensil in Ethiopian cuisine, traditionally used to scoop up various stews and dishes. Its slightly sour taste pairs perfectly with the rich flavors of Ethiopian spiced stews.

    Essential Ingredients for Spiced Stews

    To create flavorful Ethiopian spiced stews, gather a variety of essential ingredients that will elevate your dishes to authentic culinary heights. Start by stocking up on berbere, a key spice blend that typically includes chili peppers, garlic, ginger, basil, and other aromatic herbs. Berbere adds a rich, complex flavor profile to Ethiopian stews and is essential for an authentic taste.

    Next, ensure you have niter kibbeh, a spiced clarified butter that brings a unique depth of flavor to the stews. Niter kibbeh is infused with spices like turmeric, cardamom, and fenugreek, enhancing the overall taste of the dish.

    In addition to these staples, have plenty of onions, garlic, and ginger on hand for creating a flavorful base. Lentils, split peas, and various vegetables like carrots and potatoes are commonly used in Ethiopian stews to add texture and substance.

    Step-by-Step Guide to Making Injera

    As you prepare to master the art of Ethiopian cuisine, let’s now embark on the journey of creating the iconic and versatile Ethiopian flatbread known as Injera. To start, combine 1 cup of teff flour with 1 ½ cups of water in a large bowl. Stir the mixture well to ensure there are no lumps. Cover the bowl with a cloth and let it ferment for 2-3 days in a warm spot until bubbles form on the surface.

    After fermentation, heat a non-stick skillet or Injera pan over medium heat. Pour a ladleful of the fermented batter onto the pan, swirling it around to spread evenly. Cover the pan and cook for 1-2 minutes until holes form on the surface and the edges lift easily. Avoid flipping the Injera; it should only be cooked on one side.

    Once done, remove the Injera from the pan and repeat the process with the remaining batter. Stack the cooked Injera on a plate, allowing them to cool slightly before serving with delicious Ethiopian stews. Enjoy the tangy flavor and spongy texture of your homemade Injera!

    Exploring Flavorful Ethiopian Stews

    Discover the aromatic and rich Ethiopian stews that will tantalize your taste buds and transport you to the vibrant culinary world of Ethiopia.

    Ethiopian stews, known as ‘wats,’ are a staple in Ethiopian cuisine and come in various forms, each bursting with unique flavors and spices.

    One of the most popular Ethiopian stews is Doro Wat, a spicy chicken stew simmered in berbere spice mix, onions, garlic, and ginger. The rich and complex flavors of Doro Wat make it a favorite among many.

    Tibs is another beloved Ethiopian stew made with sautéed meat, vegetables, and fragrant spices like cardamom and fenugreek.

    For a vegetarian option, Misir Wat, a spicy red lentil stew, is a must-try, featuring the earthy flavors of lentils combined with a fiery berbere sauce.

    These stews are typically served on top of injera, a sourdough flatbread, making for a delightful and satisfying meal that will introduce you to the bold flavors of Ethiopian cuisine.

    Kitchen Appliances

    [product_category category=”kitchen-appliances” per_page=”10″ columns=”2″ orderby=”date” order=”rnde”]